Showing posts with label tank. Show all posts

Monday, June 30, 2014

The Baneblade ZEAL

The Baneblade, the pinnacle of armored warfare in the 41st millennium.  The stories tell of their might, a single squadron can hold off entire companies of enemy armor.  They are a rare beast these days, their loss is keenly felt and difficult to replace.  An entire war was waged to recover Commissar Yarrick's Baneblade The Fortress of Arrogance.

I got my Baneblade kit soon after they were released and painted it not much after that.  Over the last few years it was really showing its age, and I decided last year to repaint it.  I posted then that I was stripping it of its old paint and earlier this year I finally got around to slapping on a new paint job.  Zeal  is again ready to go to war for the Imperium and now I don't even have to only use it in Apocalypse.  Though the best part is seeing it with all the techniques I have learned since the last time I painted the tank.


Here it is now.

More after the break.

Tuesday, April 23, 2013

WIP: Vanquisher

Finally decided to start painting one of the Forge World turreted Vanquishers that I got last year.  Using this one as a testbed for some new techniques and thus a whole new sequence of steps in painting my armor.

The steps I go through will be
-Base color
-Modulation
-Decals & Scripting
-Filters
-Chipping
-Washes
-Streaking
-Pick out details
-Clear coat
-Powder pigments

The steps that are added with this tank are the color modulation, filter, washes, and streaking.  The modulation was made possible by my new Badger Anthem aribrush which I mentioned in my last post.  The latter are all made possible my AK Interactive's weathering line which I found at a local hobby store, Section 8 Hobbies.  They are all spirit based and thus allow plenty of time for clean up and add the ability to apply and then dilute and streak with the solvent while on the model.  I got this hull painted and stripped it as best I could, but it's still come out kinda rough with a few details with too much old paint.  The washes have allowed me to bring the lines out much better than if I had not started doing all this extra work.

As of right now I am on the streaking grime step, which is completed on the turret and the hull I will get to tomorrow.  Really glad I found these products, they really make the vehicles come out so much better with just a bit more effort than I already put into it.  Another new technique I used was doing the chipping with a sponge.  Overall, I think that technique worked out great on my Dust walker, but not as well on this.  I think it's better suited to light colored armor. For future IG tanks I will use it, but as a secondary effect to my brushed on chips and scratches.


Of course, it's not complete without an addition from the Imperial Infantryman's Uplifting Primer.


I think my next project is going to be the repainting of my Baneblade, Zeal.  I was really happy when I first painted it, but as I have progressed so far it's time for an update.  Expect a finished summary of this tank this week.


Friday, February 22, 2013

Destroyer Tank Hunter

So, I finally got around to painting up my converted tank destoyer.  I settled upon the name Armordillo.  This tank will be the lead vehicle for my 3rd Armor Squadron.  The other 2 tanks are FW turreted Vanquishers.  I used a couple new products on this tank.  They are AK productions panzer grey grime and concrete dust effect.  I used these to do some streaking which you can see in some of the side on shots.  Without further ado, here's the pics.


You can see the art I made on the barrel of an armadillo with a cannon in its back.


Saturday, August 4, 2012

Leman Russ: Judgement

Just finished painting the lead tank for my Armor Company and Armor Squadron 1.  The tank is called Judgement and it is commanded by Commissar Constantin Braun.  As this is a command tank it has some upgraded sensors and equipment, since it's the company leader I also gave it the GW command upgrade auspex/comms package.  Went about painting this tank in much the same way as my last Leman Russ Tough Bastard and every piece of armor since then.  A simple grey base followed by scratching, damage, and weathering.  It has the commander stripe with the roman numeral I for the squadron number.  Since it's commanded by a commissar it's also got the red and black stripe design on the side.

Here's a front view of the tank, there is a small medallion on the lower left and the name is below the turret on the flat of the hull.


The commander is the Forge World model and is a very nice sculpt.  He took some time to paint as there are a fair number of details to him.  In this picture you can see that I made the heavy stubber as a coaxial weapon as seen on many of the FW turrets.  I made that with a few small brass tubes.


I put about how much stowage as I usually do and of course my ridiculous whip antennas.  There are also purity seals and the like denoting the honors of the vehicle and strength of its machine spirit.  I did not add any mottos to this tank as it's got a commissar as a commander.  So, the only writing I have done is the name and the kill tally on the barrel.  It's a pretty high tally as this guy is supposed to be a company commander and should be pretty good at his job.  I will perhaps use him as Knight Commander Pask from time to time.

I generally apply much more pigment to the bottom of the hull than to to upper portion.  I will have it so that it rests on the edges of the track axel mounts and then lightly brush it up from there to slightly powder the top of the hull as well.  The top of the tank and turret get a little more in spots and streaks.  Where there are bullet marks and hit damage I add some black pigment.  I also add powder residue to the muzzle break because it looks cooler that way even though it's not all to realistic.  I use mig productions pigments, but you can use any brand you like.  I still have the same jars I bought in 2009 and will have them for several more years before they are gone.  They are ground extremely fine and cover and stay adhered very well, even with wargaming use.  I cannot speak for other brands as I have never used them, but Mig get my support.


Finally, a shot of 1st and 2nd squadron lead tanks together. Can't wait to have all 3 squadrons painted up.  3rd squadron will feature the Destroyer Tank Hunter as leader with 2 FW turret Vanquishers to form a tank hunting squadron.  1st and 2nd Squadrons are a mix of the new and old Battle Tank and Demolisher Kits a few of which have several main gun options modeled.  I can field at least 1 of any variant.


That's it for now, not sure what I am going to be working on next, I am currently waiting on some horses to use to make Rough Riders.  I may begin that project next week.  Comments and critique are appreciated, thanks for stopping by.

Saturday, July 7, 2012

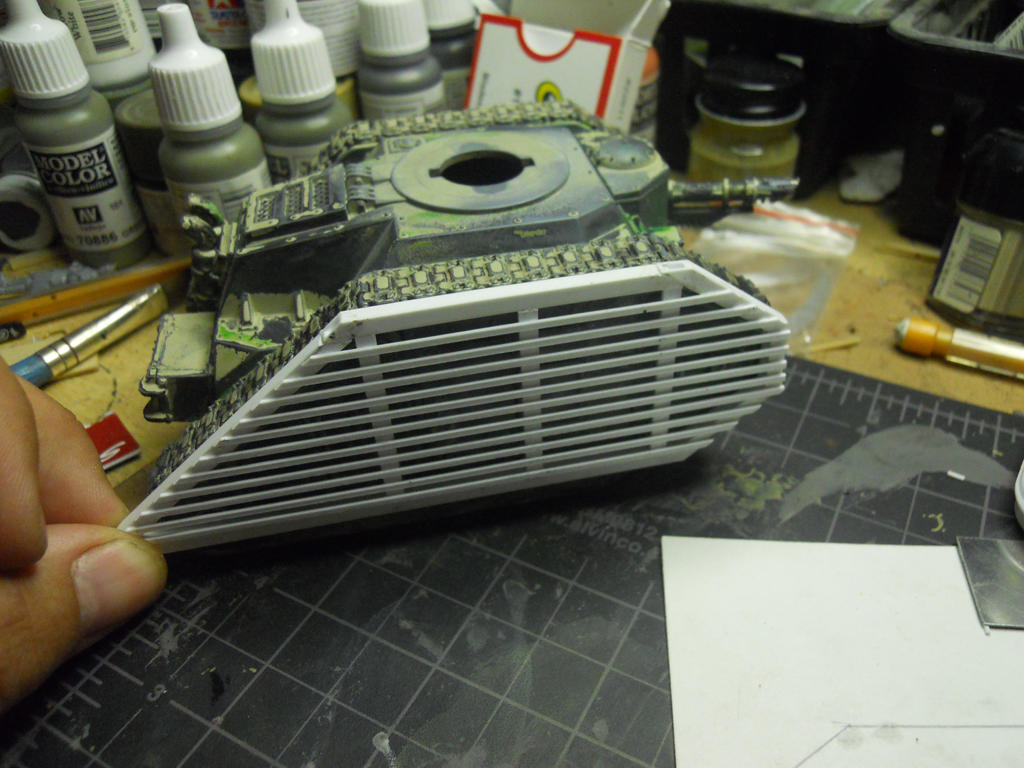
Hobby: Slat Armor for a Leman Russ

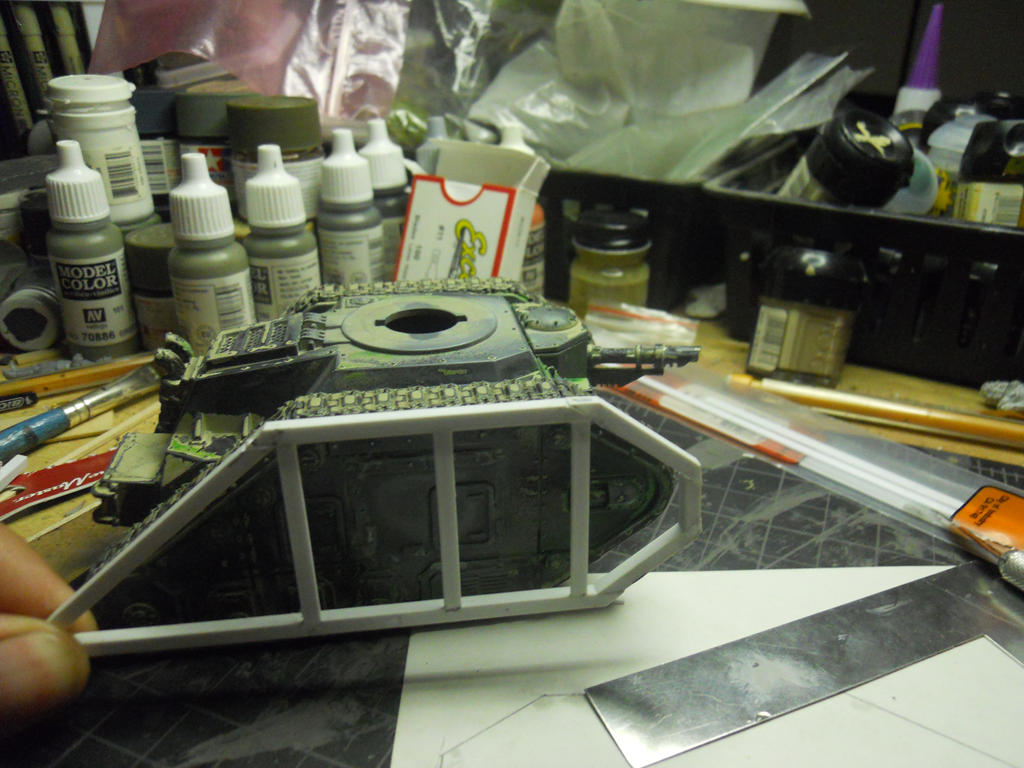
So, because I now have a tank hunting squadron of Leman Russ hulled vehicles I decided they will need extra armor.  I have bought the FW extra armor for the Chimera chassis in the past and am really happy with it, but I wanted something different for these tanks.  I decided to go with slat armor, which operated by detonating explosives before they reach the hull of the vehicle and taking away much of their penetrative power.

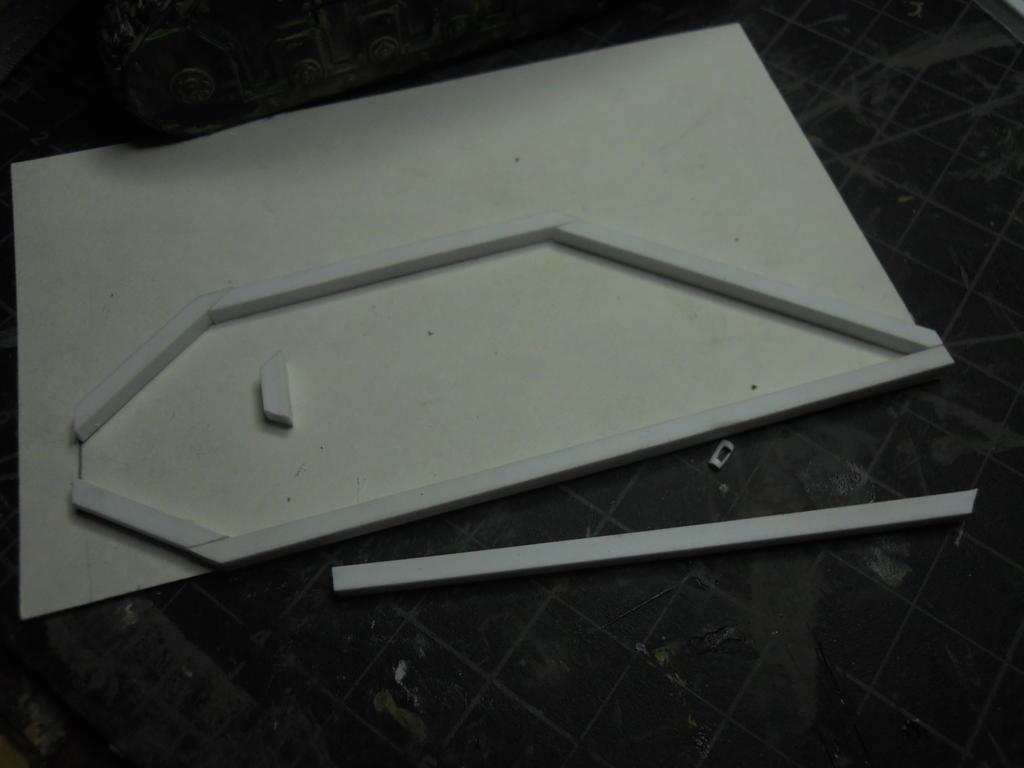
Below You can see the frame all layed out over a pattern I have made on a sheet of 3x5 card.


Next I added a few vertical supports and glued it all together with plastruct plastic weld.  Really happy with this product for use with plasticard and the like as it actually bonds the materials and won't be anywhere as brittle as super glue for this application.


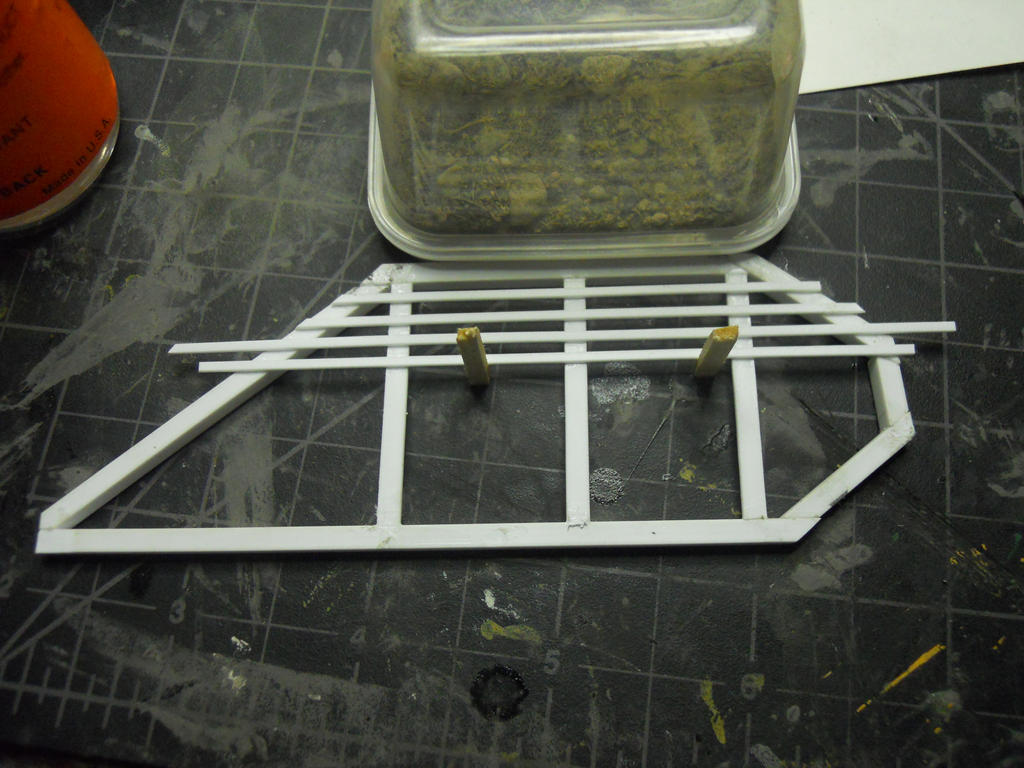
Next I begin to add the slats.  I used 2 pieces of balsa to give a uniform spacing and a little tub of basing dirt to hold it in place while I laid each slat.


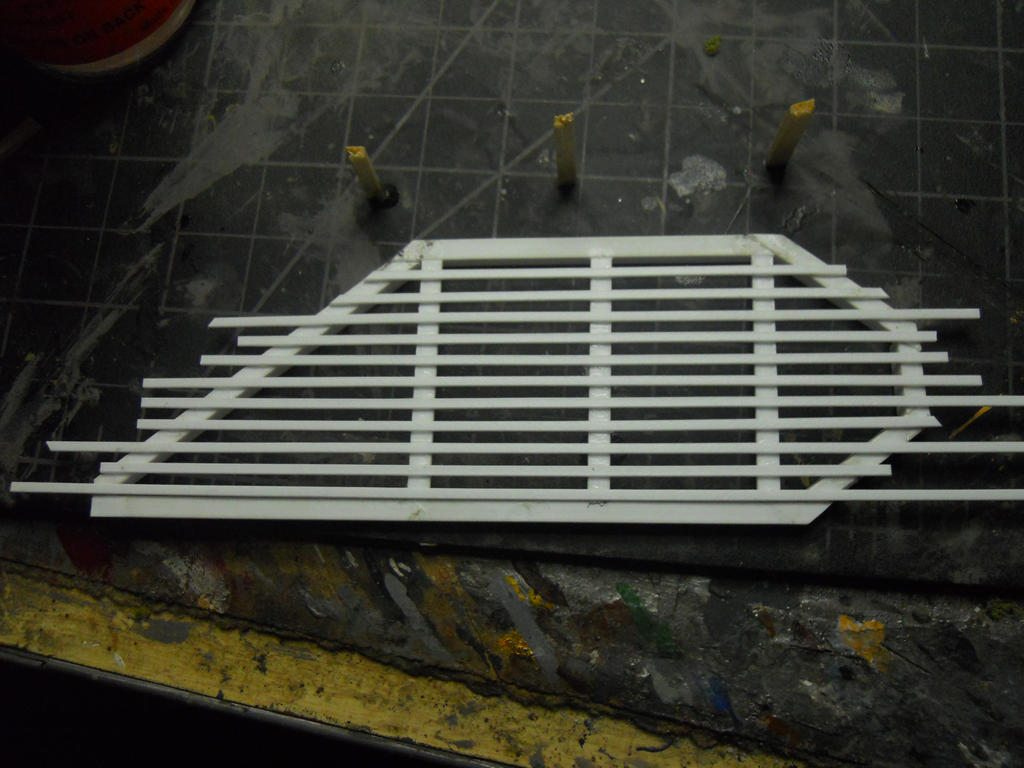
After a little while I had all the slats glued on, so I just had to give them a little time before I trimmed them all up.


He is the final result.  I really like the way it came out and I will definitely go forward with this project.  I will need to buy some more strip styrene in order to finish the other 5 for the squadron.  Will be adding magnets to the hulls so that they are not permanent.  None of the 3 vehicles have sponson weapons, so this was much easier because of that.  It would be possible to do with sponsons though and I think that it would look pretty cool on a Russ with sponsons as well.


I'm going to be adding some plasticard details to the Baneblade I am reworking in the near future.  At the least there will be mud flaps such as the ones on the FW super-heavies.

Thanks for stopping by.

Thursday, June 28, 2012

New table, new terrain! [Part 5]

So, another week and some more progress on the buildings.  All I could really do was glue down some texture and so that's what I did.  Step one is to brush on some glue.


Step two is to pour on some flock and do it 12 times until all of the buildings are done....  It was rather repetitive and took a good amount of time to do this step.  I had time to do more work but the elmer's take so much time to dry that there wasn't time to prime once it was done.


This weekend I will get the priming done and then we will be trying out 6th edition or playing some more Mordheim. While I was working the rest of the lads were playing some Mordheim when this happened. Yeah, sort that out for yourself.  I tried to make the table pretty "tiltproof"  guess I failed...


Also, another a member of our group has returned to us after a while away from gaming.  He brought 2 Leman Russ tanks which I bought from him to use with my Forge World Turrets.  I need to strip them to repaint them so for tonight they are soaking in Simple Green.  This is the first time I am using it so I really hope it works out.  From what I understand it's the best way to strip plastics.  I am also going to strip my Baneblade for repainting if this proves to work out.


Stay tuned, next week should see some start to the painting of all of the buildings.