It's been awhile, but the blog has finally caught up to me. I don't have a finished model to post this week. That's not to say there is nothing! I have here a long in coming squad of Cadian Rough Riders squad which I have been working on for a rather long time. I started converting the first one in 2012!!! You can see a post about that HERE. I've posted about them here and there since then, but now they are finally getting some much needed paint!
Not being a Fantasy [R.I.P.] player, I've never had to paint any horses before, so that's where I started working here. I finished them in April or so and then having to do base layers on the riders has caused me to stretch out painting them ever since. I loathe doing base colors. Today I finally finished the base colors and even threw a wash on. I hope to keep rolling along and finish them by next week. That way I can start a new project before the next blog post.
I think I have mentioned it before but they are going to be magnetized to allow for some variation, if I ever use them that is. Stay frosty!
Showing posts with label top. Show all posts
Wednesday, July 1, 2015
WH40k: WiP Cadian Rough Riders
Wednesday, June 25, 2014
The Knights of the Order of Thanatos
Yet again I have to introduce a post after such a long hiatus from the blog. It's been quite a while since I have updated this blog with the idea of re-shooting my model collection. That has not happened, but I have not been idle. As I mentioned back then I did repaint my Baneblade, Zeal, though I failed to take any pictures until today. In the meantime the release of the Imperial Knight kit by Games Workshop really got me fired up and into painting mode. My friend Kevin and I immediately decided to order some of them and I would paint them to match. We've always wanted to start a Titan Legion, but have never spent the cash, so this was a pretty awesome second chance. We each ordered a Knight and I also ordered a Dreamforge Leviathan, not knowing it would be far too large to join our Knightly Order and will instead he the founding member of a Titan Legion. In exchange for painting his Knight, Kevin paid for some of my order and also got the expanded decal set. Three months later and I have finally kept up my end of the bargain and finished the Knights. Not for lack of effort though as April was the only month I really did not work on them. But we are going to have an Apocalypse game soon and I really wanted to have them done for that, even if they will be on opposite sides of the conflict.
Without anymore senseless blather, here they are, face to face, ready to fight.
More after the break.
Without anymore senseless blather, here they are, face to face, ready to fight.
![]() |
| The Imperial Knight is a really fantastic kit and a dream to build and paint. The only thing I would ask for is a bit more freedom in the legs. |
More after the break.
Sunday, April 14, 2013
On the Workbench
It has been some time since I have updated the blog, but that is not to say that I have been idle with regards to the hobby. I just sort of lost steam with the battle reports, as I usually do. From now on I will probably condense the reports into a single tournament summary post. Once in a while highlighting a very good or close game with its own battle report.
The primary reason I got into this hobby is the building and painting aspect. Being able to play with all of my models is really an excellent bonus to that and has become a larger part of my enjoyment. That being said I'd rather not turn the blog into a chore by trying to force myself into writing bat-reps and just write about what I do each week.
Several weeks ago I finally got around to painting some more Dust Warfare stuff. First up is the first walker I have painted the Medium Panzer Walker. I recently found out about a relatively new hobby shop a few blocks from where we game every week. They don't carry much in the way of wargaming but they have begun to stock some Games-Workshop products. They have an awesome collection of scale kits and a wide array of paints and weathering products. I picked up the DAK weathering kit from AK Interactive, it includes a wash, a streaking grime, and a filter. I watched a few weathering tutorials and ended up with what you see here. The filter helps modulate the base colors, the wash helps bring out the details, and the streaking grime adds streaks of washed down grime. I also started using a fine sponge to add the chipping and then paint some some finer scratches here and there.
The primary reason I got into this hobby is the building and painting aspect. Being able to play with all of my models is really an excellent bonus to that and has become a larger part of my enjoyment. That being said I'd rather not turn the blog into a chore by trying to force myself into writing bat-reps and just write about what I do each week.
Several weeks ago I finally got around to painting some more Dust Warfare stuff. First up is the first walker I have painted the Medium Panzer Walker. I recently found out about a relatively new hobby shop a few blocks from where we game every week. They don't carry much in the way of wargaming but they have begun to stock some Games-Workshop products. They have an awesome collection of scale kits and a wide array of paints and weathering products. I picked up the DAK weathering kit from AK Interactive, it includes a wash, a streaking grime, and a filter. I watched a few weathering tutorials and ended up with what you see here. The filter helps modulate the base colors, the wash helps bring out the details, and the streaking grime adds streaks of washed down grime. I also started using a fine sponge to add the chipping and then paint some some finer scratches here and there.
Saturday, January 19, 2013
MURDER: INITIATE!
I don't really care for Ogyrns, I mean sure they endearingly stupid and naive but they're abhumans. So, here's my solution so that I can use Ogyrns in my army; Mechanicus constructed Murder Servitors. They're big, they're mean, they have guns for hands. I built these guys a while back (over a year ago I think) and I finally got around to painting them thanks to an ongoing challenge. My friend Kevin and I have agreed to paint 1 unit a week for the foreseeable future, barring and sickness or vacations. If one of us fails to complete something in a given week, then we owe the other $20. The first week I painted my Recon Grenadiers and he finished his Cygnar Stormwall. Last week he painted his Mordhiem Warband and I started these guys. I did not get too much done and wound up owing him 20 bucks. This week I spent 4 nights working on these guys and finished them!
Here they are ready to murder your troops!
All that skin and muscle detail is the reason they took so long, I will say that I would never want to paint an Ogre army...
That's it for now, next week I am going to try and paint my rebuilt Mordhiem warband. Last time I used Empre State Troops. I wanted a grittier look so I have remade them using Empire Militia and Empire Greatswords. I am very pleased with how they turned out.
Stay tuned!
Labels:
40000,
40k,
conversion,
elites,
games,
games-workshop,
gaming,
guard,
imperial,
murder,
ogyrns,
painted,
servitor,
table,
tabletop,
top,
war,
wargaming,
warhammer,
workshop
Thursday, September 13, 2012
Battle Report: September 8th Tournament: Game 1 Imperial Guard Vs Tyranids 1850 Pts
This month's Warhammer 40,000 tournament at Millenium Games in Rochester, NY was last Saturday. The format was rulebook 40k, pre-set or 'cinematic' terrain if you like, and 1850pts. No comp, no painting, the only goal here was to win. Well, win and have fun.
I usually try to make a balanced list or go with something less utilized. This month I went with something I have found to always be reliable. The Leman Russ Tank. Specifically, the Executioner variant as it very rarely fails me when I use it and I always take it with plasma cannon sponsons and a hull mounted lascannon.
The night before the tournament GW dropped the FAQs upon us and the Leman Russ became a Heavy Vehicle, which helps out with a lot of the variants. I do like the change, even with the lack of movement over 6 inches. I think the old lumbering behemoth was very characterful.
Here's my list!
Imperial Guard:
HQ
Company Command: Power sword, med-pack, Standard, plasma gun, Vox, & 2 bodyguards
Troops
Veteran Squad: Demolitions, 3 Meltaguns, Power sword
Veteran Squad: Grenadiers, 3 Plasma Guns, Power Sword
Chimera: Hvy Stubber
Veteran Squad: Sentries, 3 Sniper Rifles, Lascannon, Vox
Veteran Squad: 3 grenade launchers, lascannon
Chimera: Heavy Stubber
Fast Attack
Vendetta Gunship
Heavy Support
Leman Russ Squadron
1>LR Executioner: Plasma Sponsons, Lascannon, Heavy Stubber
2>LR Executioner: Plasma Sponsons, Lascannon, Heavy Stubber
LR Battle Tank: Heavy Bolter Sponsons, Lascannon
LR Vanquisher: Lascannon, Multi Melta Sponsons
My opponent for game 1 was my friend Chris, who drove me to the tournament, and his tyranids:
Flyrant
Trygon
Tervigon
Shooty Carnifex Duo
Shooty Carnifex(In pod)
3x Warriors
1x Hive guard
10x guants
Tyranid Prime
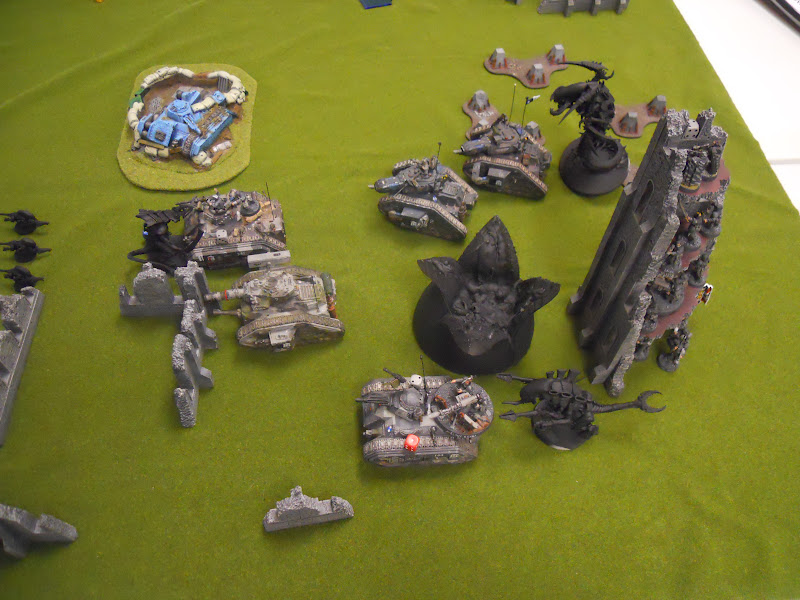
Game 1 used the Hammer & Anvil deployment and Big Guns Never Tire for scenario. My warlord trait gave my outflanking units acute senses I do no recall what Chris' did. We roll and get 3 objectives, he places 2 and I one. Here's our terrain set up.
I get first turn and deploy as seen below; the Vendetta and the melta vets are coming. I put the snipers in the ruin and the objective turns out to give a +1 to cover, meaning they gain 1 2+ cover save while camping the objective. I wish I could get this every game I played. The command is on the floor below them to issue orders and guard against assault. Everything else deploys to advance and crossfire.
Here is Chris' deployment. The Trygon and pod Carnifex are in reserve. He fails to seize but we do have night-fighting for turn 1.
Turn 1
I advance the Grenade vets in their chimera and the Leman Russ Battle Tank, keeping everything else stationary.
In the shooting phase I put almost everything I have at the Carnifex team, between everything I score a lot of hits, and he makes a good amount of saves but I still end up killing one and putting 3 wounds on the other. I also put 2 wounds on the Prime from splash and I think kill 1 gaunt.
In his turn he spawns a unit of 15, the maximum without doubles. He moves up the gaunts, prime, and remaining fex. He casts some boons to them, I think increasing the toughness or some such. The fex shoots at the Chimera and manages to stun it.
Turn 2
First I roll for the Valkyrie and it does indeed arrive. I advance everything but the Grenade Launcher Chimera and the objective holders.
In shooting I finish off the carnifex gaining First Blood and since it is a Heavy it gains me 2 Victory Points. The vendetta shoots at the Tervigon and does 1 wound.
The fex shoots the rear of my other Chimera and stuns it. The pod shoots and my command squad and kills bodyguards.
In the assault phase the prime charges in on my GL vet Chimera and blows it up. The squad holds its own in the cover I lost 3 scrubs.
Turn 2 Summary: Guard 5 (First Blood, Heavy Kill, Objective), Nids 7 (2 Objectives, Linebreaker)
Turn 3
I make another on the near table edge with the Leman Russ, going for the linebreaker. The lower chimera rotates to face the fex, the executioners turn to face the trygon, the vanquisher turns to face it as well, and the Vendetta turns on the flyrant.
This turn I take out the tervigon, put some wounds on the flyrant and on the carnifex.
It was the first aerial combat of the day.
The tyranids advance again and he spawns 14 more guants. The carnifex moves in on my command squad. Shooting from the flyrant takes the vendetta down a hull point. The pod manages to wreak my other chimera.
In the assault phase the fex goes into my command squad, the guants attack my dismounted plasma vets. The fex is downed by my command but the guants take out the veterans. The same squad that turned back a unit of reavers a few months ago.
Turn 3 summary: Guard 7 (1 Objective, First Blood, 3 Heavy Kills), Nids 7 (2 Objectives, Linebreaker)
Turn 4
I move the vendetta towards the corner and dismount the Vets with Grav Chute Insertion, they do not scatter and none of them die.
On his turn he advance gaunts towards my Melta vets and the flyrant at my Executioners. He shoots at the vets and kills a few and then assaults the Executioners to little effect.
Turn 4 Summary: Guard 8 (1 Objective, First Blood, 3 Heavy Kills, Linebreaker), Nids 7 (2 Objectives, Linebreaker)
Turn 5
I forgot to take any pictures this turn but it mostly involves me killing the flyrant. He returns fire and kills a couple more veterans from the melta squad and some from the sniper squad with the pod.
Summary
In the end this game was pretty close, at first we thought it was a draw because we forgot to count each heavy killed as another Victory point. I had some very good rolls this game, and my shooting was especially effective. In the end I wound up with 10 VP; 3 for my objective, 1 for linebreaker, 1 for First blood, 1 for slay the warlord, and 4 for Heavy kills. Chris came up with 7; 6 for objectives and 1 for linebreaker.
Mt next batrep may be up next week and will detail the events of my first battle against Daemons.
Labels:
40000,
40k,
battle,
game,
guard,
imperial,
local,
report,
reports,
table,
tabletop,
top,
tournament,
tyranids,
war,
wargame,
warhammer
Friday, September 7, 2012
New table, new terrain! [Part 9]
Just a small update today. I have not been doing much of anything on the hobby front for the last 2 weeks. Tomorrow there is a tournament in Rochester though, so I am excited about that. It should get me rolling again.
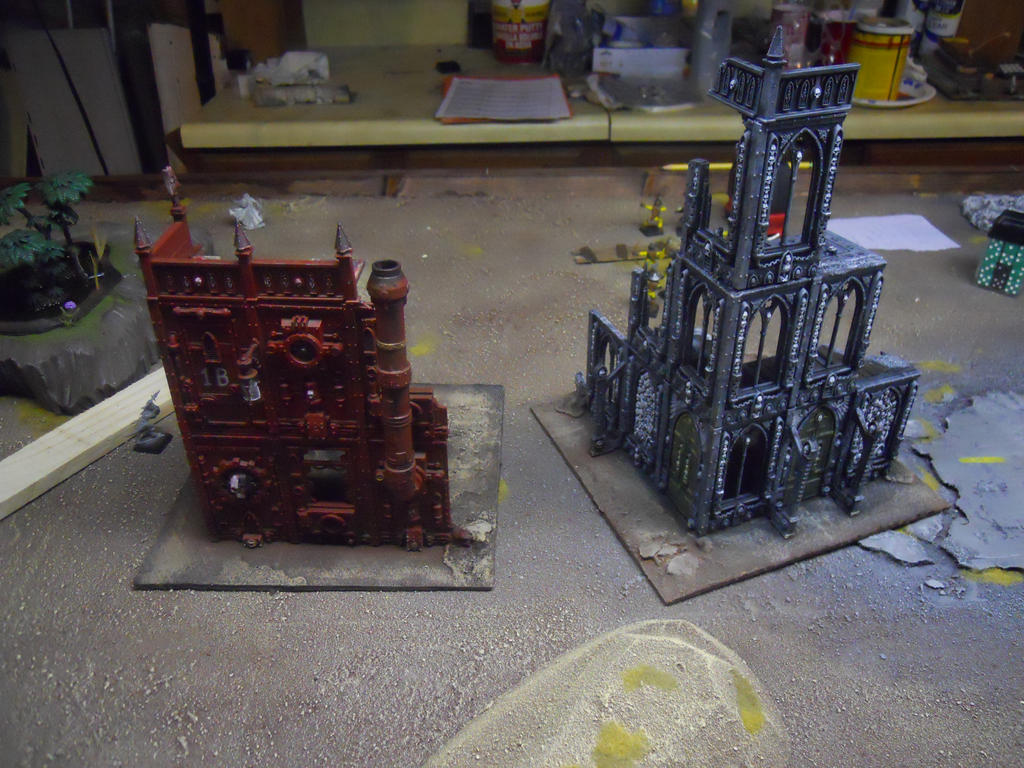
Here's the building I painted at our last game night. It's a small mechanicus building. It was built from spare parts by Kevin and has been known as the "Minifactorum" for years now. Glad to finally see it painted!
Here's a shot of the inside.
Gonna take my camera to the tournament and take lots of pictures (if I remember to) so expect some battle reports over the next week or so. Probably going to pick up some more models for Dust: Warfare so I should have an update for that game coming too. I have actually painted quite a few units, but I have not come up with a basing scheme yet, so I have not photographed them.
Here's the building I painted at our last game night. It's a small mechanicus building. It was built from spare parts by Kevin and has been known as the "Minifactorum" for years now. Glad to finally see it painted!
Here's a shot of the inside.
Gonna take my camera to the tournament and take lots of pictures (if I remember to) so expect some battle reports over the next week or so. Probably going to pick up some more models for Dust: Warfare so I should have an update for that game coming too. I have actually painted quite a few units, but I have not come up with a basing scheme yet, so I have not photographed them.
Labels:
28mm,
cities,
death,
game,
games,
manufactory,
of,
table,
tabletop,
terrain,
top,
war,
wargaming,
workshop
Saturday, August 11, 2012
New table, new terrain! [Part 8]
Got some more buildings painted up last week for the table. Forgot to bring home a piece of foam to use to base the trees, for the 4th week in a row... Still, the completed terrain collection grows every week and will eventually be complete. Eventually, maybe not too soon for the list is long.
First up we've got a Cities of Death building which I have painted blue and white. On the front the graffiti says "Freiberg Resists" with a small aquila above it. What is the city resisting? Why the enemies of the Emperor of course.
Here's a shot of the inside, there are a few small craters and bits of debris in there.
Next up is another Pegasus building. This one has got a door and a complete first floor. The writing is telling you to stay out because of the plague zombies. Nurgle has visited our fair city.
Here's a shot of the other side and most of the interior. A little bit of debris inside and there is a pot belly stove hidden by the wall. There is also writing on the outside wall that says "All is lost." Not everyone thinks the city is doing a good job of resisting anything.
Well, that is it for now. I have received an order of medieval horses from GW and have begun to construct my rough riders. It's going to be rather time consuming to reconstruct all of the legs for each rider from the Cadian plastics. I may just buy some casting stuff at last.
Stay tuned.
First up we've got a Cities of Death building which I have painted blue and white. On the front the graffiti says "Freiberg Resists" with a small aquila above it. What is the city resisting? Why the enemies of the Emperor of course.
Here's a shot of the inside, there are a few small craters and bits of debris in there.
Next up is another Pegasus building. This one has got a door and a complete first floor. The writing is telling you to stay out because of the plague zombies. Nurgle has visited our fair city.
Here's a shot of the other side and most of the interior. A little bit of debris inside and there is a pot belly stove hidden by the wall. There is also writing on the outside wall that says "All is lost." Not everyone thinks the city is doing a good job of resisting anything.
Well, that is it for now. I have received an order of medieval horses from GW and have begun to construct my rough riders. It's going to be rather time consuming to reconstruct all of the legs for each rider from the Cadian plastics. I may just buy some casting stuff at last.
Stay tuned.
Monday, July 30, 2012
New table, new terrain! [Part 7]
Another week, another post. This time, more terrain for our new gaming table. First up we have the 2 ponds which I started a while ago and finished about a week and a half ago. Really like how they came out and how they look. The most time consuming part was the tufts of tall grass each needing to be drilled, then rolled and glued into place. Each has 3 little plasticard fish hiding around the weeds or grass. Finished it off with some printed, laser-cut lily pads.
Here's a shot of pond 1.
And here is pond 2. The resin really works well for water effects.
This Sunday we made it over to Kevin's for a game night finally. While my brother fought his necrons against Chris' Tau/Eldar alliance I painted up some more terrain. First we have a building from Pegasus. Lots of grays dry brushed on here. A nice checkerboard floor too.
Here's a view of the outside, which has a little Chaos graffiti.
Here's the next building I painted, one from the cities of death sets. Lots of details to pick out on these and it took a while to finish. There will be a tree in that small square once I get one for it.
Here's the inside.
Finally I dry brushed all of the foam terrain here was left to paint. There were 2 small ruin pieces, the large ruin, and 3 urban wreak markers.
That's all for this now, working on a Leman Russ at the moment so you can expect that in the next few days. As always comments and critique are highly appreciated.
Here's a shot of pond 1.
And here is pond 2. The resin really works well for water effects.
This Sunday we made it over to Kevin's for a game night finally. While my brother fought his necrons against Chris' Tau/Eldar alliance I painted up some more terrain. First we have a building from Pegasus. Lots of grays dry brushed on here. A nice checkerboard floor too.
Here's a view of the outside, which has a little Chaos graffiti.
Here's the next building I painted, one from the cities of death sets. Lots of details to pick out on these and it took a while to finish. There will be a tree in that small square once I get one for it.
Here's the inside.
Finally I dry brushed all of the foam terrain here was left to paint. There were 2 small ruin pieces, the large ruin, and 3 urban wreak markers.
That's all for this now, working on a Leman Russ at the moment so you can expect that in the next few days. As always comments and critique are highly appreciated.
Tuesday, July 3, 2012
New table, new terrain! [Part 6]
Well, just go an email on Monday that my 6 ed rulebook is shipping. A week after I got an email saying it was "dispatched." Oh well.
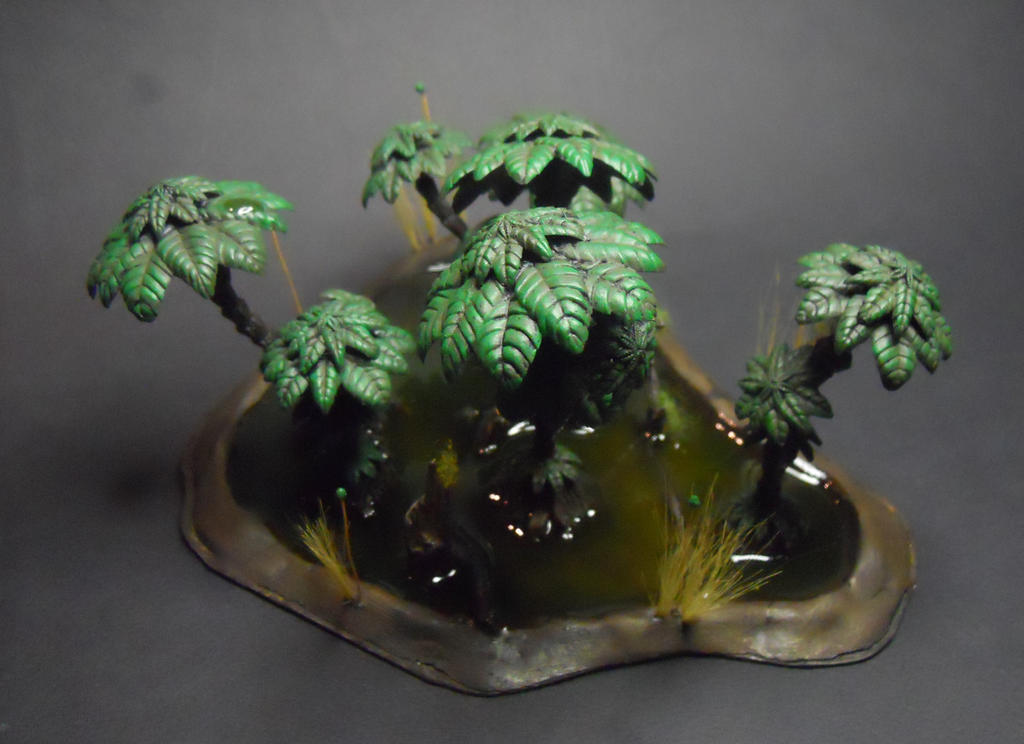
Over the last few days I have been very productive on the terrain front! A couple nights ago I built the base for this small swamp after I finished painting my Heavy Recon Grenadiers for my Dust Warfare Axis army. The next day I got out the paint, some resin, and these GW plants and whipped this out. The water is really murky, I just mix some paint right into the resin. They sell dyes but this really works fine and has not yet had a negative effect on the resin.
When that was done being poured I finally painted the sentinel and dead pilot to finish up this piece. I have been working on this on and off for over a year, don't know why it took me so long but it did.
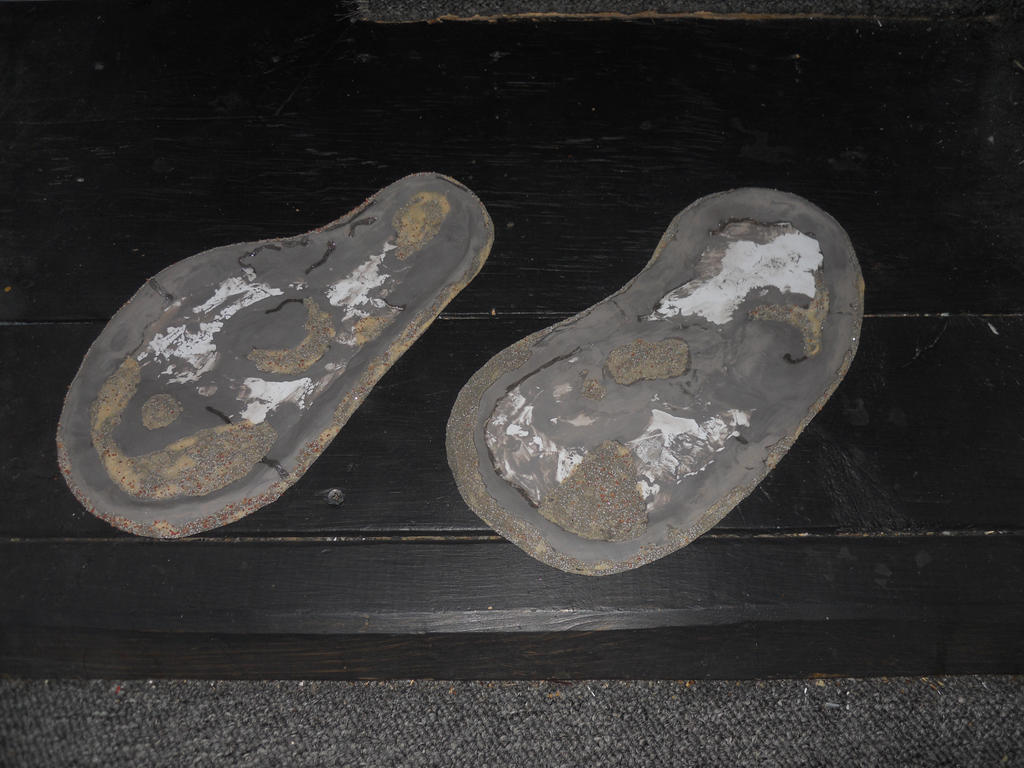
Sunday I started out by making the bases for a duo of ponds to be used for terrain. Not really picture worthy, but it took a little while to get them how I wanted them. Next we went supply shopping. Lots of stuff was purchased, spray paint, glue, resin, stuff to make trees, craft paints for terrain, plasticard, and some other nick-nacks. I was looking for pre-made trees like I've seen at Millenium Games tournaments but they did not have them at my hobby shop, despite having a huge selection of model RR stuff. They sell higher quality single trees and I got one of those to use as one of the random happenings from Mordheim. We had to buy the raw materials for trees instead.
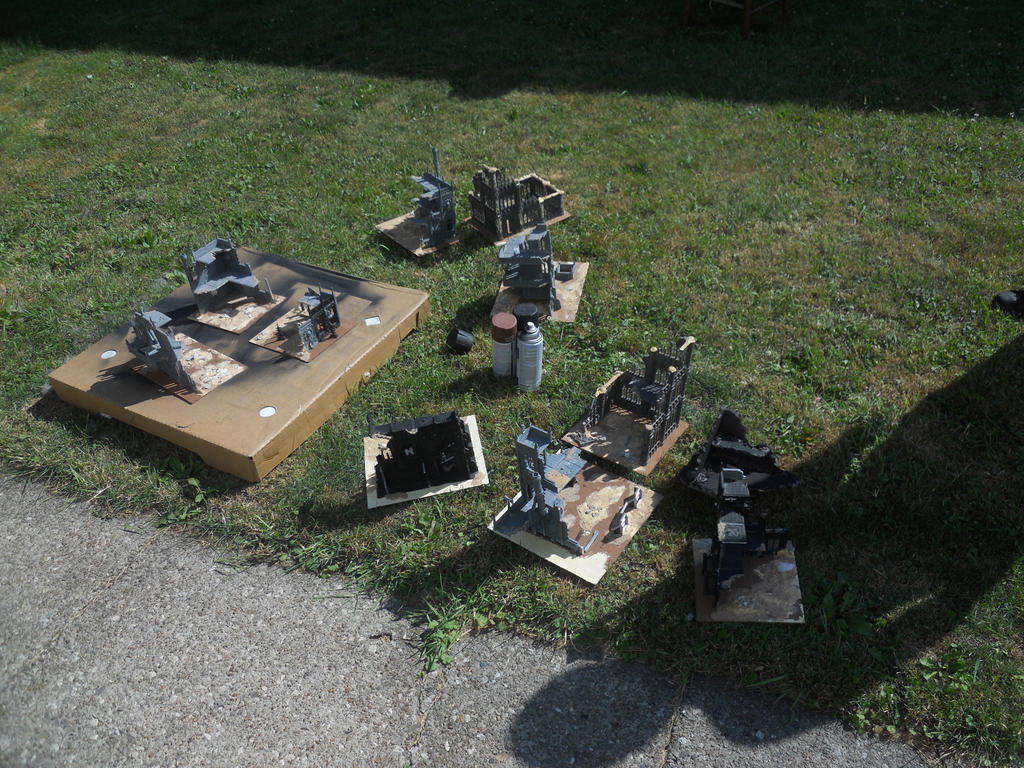
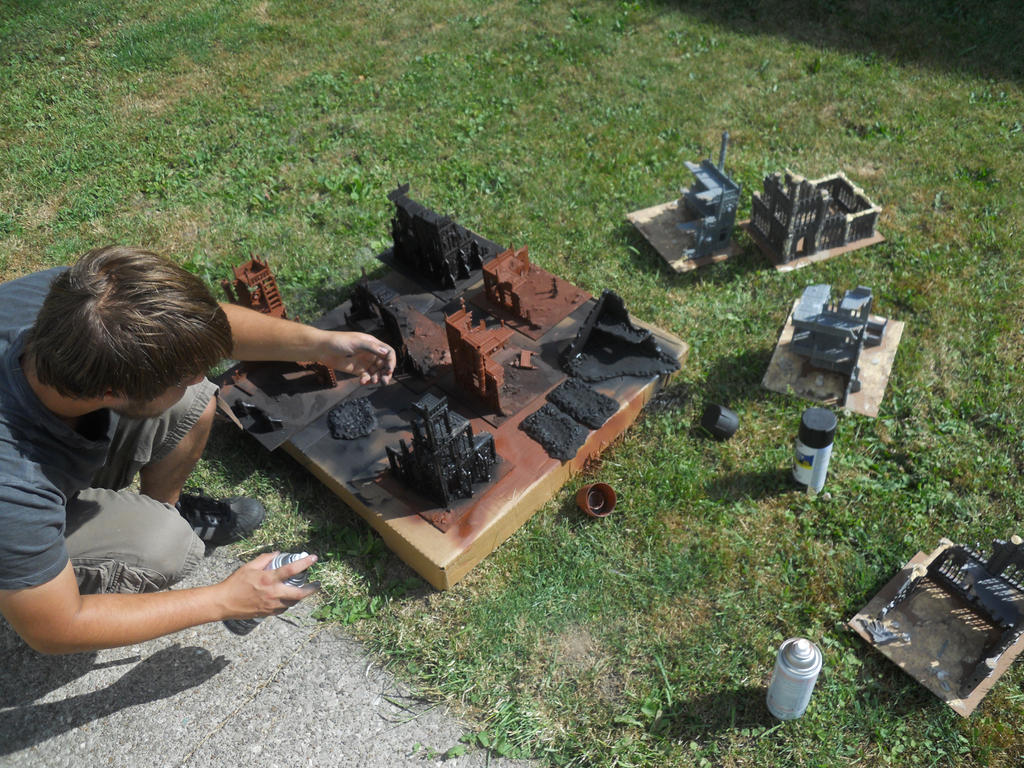
After shopping we headed over to Kevin's for terrain work/ game night. My brother and I got to work priming all of the buildings(expect the church, it still needs a roof) either brown or black. It was nice out so we opted not to do the spraying in the basement this time.
Most of the buildings will be black, with the mechanicus ones getting a reddish brown base. The bases will either be urban or sand waste to match my table so they got the black or brown paint as well. My brother helped me out and really made a mess of his hands with the spray paint.
Once that was done I cracked open those new craft paints and got to work. Here are the first two buildings. I opted for a somewhat simple painting job as I have a lot of buildings to do and they are just terrain. The buildings get a drybrush or two over the primer and then I picked out some of the key details. Same goes for the bases. It's pretty fast and looks pretty good. Not my best work, but for this it really gets the job done and is much better than the unpainted buildings we have been playing on for the last 5 years or so.
Monday night I started out by doing a bit more on the ponds. I did some sanding and filling where required on the clay and then added some sand and texture around the outside (it will end up matching the sandy part of the table there) as well as some places in the pond where it will be a gravel bottom. From the outside to the waterline will be static grass and tall grasses, perhaps some cat tail like plants like the ones around the mini-swamp. In the water will be algae like stuff, some lily pads I bought, and some fish I am going to make from plasticard. Most of the bottom will be mud.
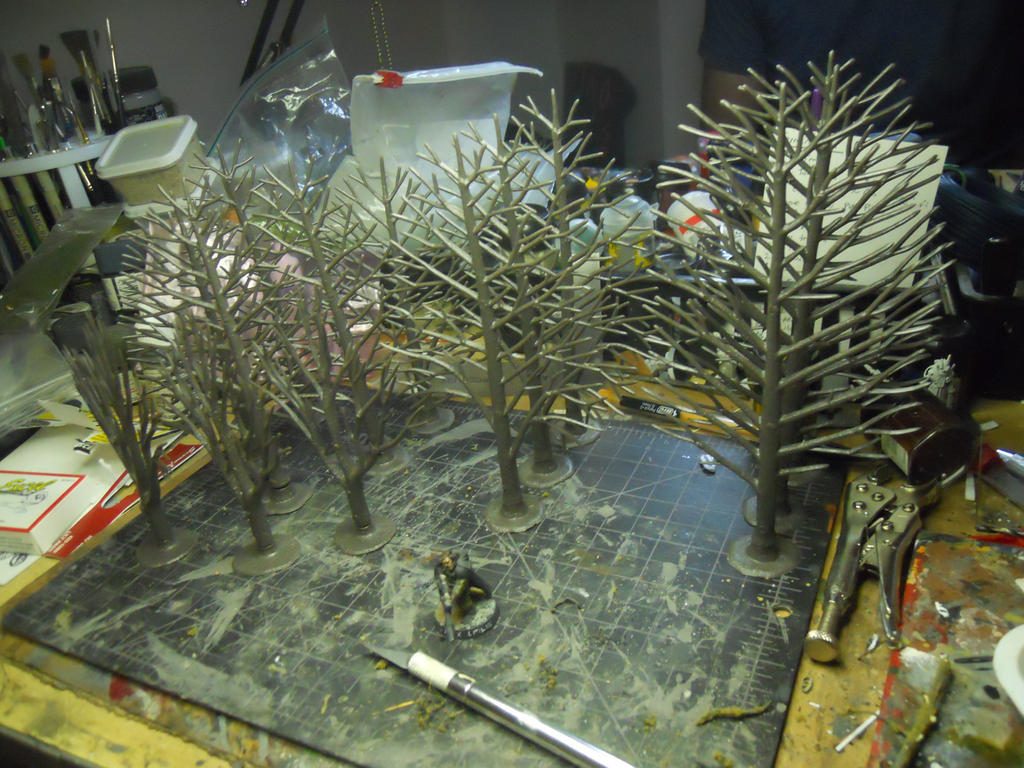
Since I could do no more on the ponds until the Elmer's dried I started to work on some trees. Since they didn't have the multi-packs of the cheaper trees we opted to make our own using the Woodland Scenics supplies available at the hobby store. We bought the largest armatures they had and 3 boxes of the fine-leaf foliage; dead, olive, and medium green. Here are a bunch of the wire cored armatures.
Here you can see how it works. You bend the flat armature into a 3d shape, then you tear out little tufts of the foliage and superglue them to the branches. It takes some patience and a lot of time to do each tree, but it's really kind of fun.
I built 4 trees so far one with the dead brush, 2 olive colored ones, and one medium green one. My brother wanted a scraggly looking tree so he built the one in the lower right. I really like Woodland Scenics for this kind of stuff, they have a great selection and it's usually good to work with. If you want great looking trees I really recommend doing it this way. It may take some time but you should be very happy with the results. It's amazing how lifelike they look when seeing them in real life rather than through my mediocre camera.
Over the last few days I have been very productive on the terrain front! A couple nights ago I built the base for this small swamp after I finished painting my Heavy Recon Grenadiers for my Dust Warfare Axis army. The next day I got out the paint, some resin, and these GW plants and whipped this out. The water is really murky, I just mix some paint right into the resin. They sell dyes but this really works fine and has not yet had a negative effect on the resin.
When that was done being poured I finally painted the sentinel and dead pilot to finish up this piece. I have been working on this on and off for over a year, don't know why it took me so long but it did.
Sunday I started out by making the bases for a duo of ponds to be used for terrain. Not really picture worthy, but it took a little while to get them how I wanted them. Next we went supply shopping. Lots of stuff was purchased, spray paint, glue, resin, stuff to make trees, craft paints for terrain, plasticard, and some other nick-nacks. I was looking for pre-made trees like I've seen at Millenium Games tournaments but they did not have them at my hobby shop, despite having a huge selection of model RR stuff. They sell higher quality single trees and I got one of those to use as one of the random happenings from Mordheim. We had to buy the raw materials for trees instead.
After shopping we headed over to Kevin's for terrain work/ game night. My brother and I got to work priming all of the buildings(expect the church, it still needs a roof) either brown or black. It was nice out so we opted not to do the spraying in the basement this time.
Most of the buildings will be black, with the mechanicus ones getting a reddish brown base. The bases will either be urban or sand waste to match my table so they got the black or brown paint as well. My brother helped me out and really made a mess of his hands with the spray paint.
Once that was done I cracked open those new craft paints and got to work. Here are the first two buildings. I opted for a somewhat simple painting job as I have a lot of buildings to do and they are just terrain. The buildings get a drybrush or two over the primer and then I picked out some of the key details. Same goes for the bases. It's pretty fast and looks pretty good. Not my best work, but for this it really gets the job done and is much better than the unpainted buildings we have been playing on for the last 5 years or so.
Monday night I started out by doing a bit more on the ponds. I did some sanding and filling where required on the clay and then added some sand and texture around the outside (it will end up matching the sandy part of the table there) as well as some places in the pond where it will be a gravel bottom. From the outside to the waterline will be static grass and tall grasses, perhaps some cat tail like plants like the ones around the mini-swamp. In the water will be algae like stuff, some lily pads I bought, and some fish I am going to make from plasticard. Most of the bottom will be mud.
Since I could do no more on the ponds until the Elmer's dried I started to work on some trees. Since they didn't have the multi-packs of the cheaper trees we opted to make our own using the Woodland Scenics supplies available at the hobby store. We bought the largest armatures they had and 3 boxes of the fine-leaf foliage; dead, olive, and medium green. Here are a bunch of the wire cored armatures.
Here you can see how it works. You bend the flat armature into a 3d shape, then you tear out little tufts of the foliage and superglue them to the branches. It takes some patience and a lot of time to do each tree, but it's really kind of fun.
I built 4 trees so far one with the dead brush, 2 olive colored ones, and one medium green one. My brother wanted a scraggly looking tree so he built the one in the lower right. I really like Woodland Scenics for this kind of stuff, they have a great selection and it's usually good to work with. If you want great looking trees I really recommend doing it this way. It may take some time but you should be very happy with the results. It's amazing how lifelike they look when seeing them in real life rather than through my mediocre camera.
Well, my rulebook is set to arrive tomorrow so you may expect a reaction to that tomorrow. Otherwise I won't be getting much terraining done until perhaps Thursday due to Tuesday disc golf league and Wednesday being Independence Day here in the USA.
I ran out of room on google for images for this blog, so now it's become a pain to add them to my posts. I first have to upload them elsewhere then add the image URLs one at a time. I may just cave in and buy 10gb of storage from google for the 2.50 or so a month that it costs. May not. I still have 2 free gb at the other site so we'll see how my patience lasts.
They wait for me in the forest.
I ran out of room on google for images for this blog, so now it's become a pain to add them to my posts. I first have to upload them elsewhere then add the image URLs one at a time. I may just cave in and buy 10gb of storage from google for the 2.50 or so a month that it costs. May not. I still have 2 free gb at the other site so we'll see how my patience lasts.
They wait for me in the forest.
Wednesday, June 20, 2012
New table, new terrain! [Part 4]
Okay, some more terrain updates. I spent the last gaming night working on the basing for the buildings. I added some texture to all of the hardboard in the form of water putty. I also added some bits and lots of rubble pieces. There are lots of buildings to work on...
Here's a close up of one which I incorporated an Aegis line piece into.
A shot of some more of the buildings. I believe there are somewhere from 8-10 pieces.
So while I was going to do the flocking as well, the rest of the gang started a new Mordhiem campaign. They needed a lot of the buildings for their game, because it's not Mordheim without buildings. In order to keep working, I decided to start working on the pews for the church. Here's the test one I did with Andy's spare balsa sheets.
Then I cut out all of the parts for 9 more of them...
And got to assembling them all. Here's a little gauge I made to make sure the legs were all the same height.
Then 10 finished pews appeared in the church. The congregation was happy that they finally had someplace to sit as they worshiped the Emperor and the dice gods. A statue from a LoTR set will stand in for some sort of saint and the altar will be made of 2 d6 dice which will get a wood top.
As the people were worshiping, some chaos folk cam in and shot the place up. How rude! On this side we have some flamer damage, bullet holes, and shotgun blasts.
On the other side there are more bullet and shotshell holes.
So there we have it, a church in a warzone. Next week I will be flocking all of these buildings and perhaps priming them as well. It's going to be a long process on these and I still have an entire list of other terrain features I want to add to the collection to update it.
-Raised Pipes
-3ft Defense Wall
Here's a close up of one which I incorporated an Aegis line piece into.
A shot of some more of the buildings. I believe there are somewhere from 8-10 pieces.
So while I was going to do the flocking as well, the rest of the gang started a new Mordhiem campaign. They needed a lot of the buildings for their game, because it's not Mordheim without buildings. In order to keep working, I decided to start working on the pews for the church. Here's the test one I did with Andy's spare balsa sheets.
Then I cut out all of the parts for 9 more of them...
And got to assembling them all. Here's a little gauge I made to make sure the legs were all the same height.
Then 10 finished pews appeared in the church. The congregation was happy that they finally had someplace to sit as they worshiped the Emperor and the dice gods. A statue from a LoTR set will stand in for some sort of saint and the altar will be made of 2 d6 dice which will get a wood top.
As the people were worshiping, some chaos folk cam in and shot the place up. How rude! On this side we have some flamer damage, bullet holes, and shotgun blasts.
On the other side there are more bullet and shotshell holes.
So there we have it, a church in a warzone. Next week I will be flocking all of these buildings and perhaps priming them as well. It's going to be a long process on these and I still have an entire list of other terrain features I want to add to the collection to update it.
-Raised Pipes
-3ft Defense Wall
-6x Tanks Traps
-6x Fences
-Scatter Terrain
-Supply Dump
-HQ Emplacement
-4x Emplacements
Plus some other random stuff I already started, like a small LOS blocking hill, a couple ruined vehicles, and an overrun lascannon emplacement. Wish me luck.
Subscribe to:
Posts (Atom)