Showing posts with label report. Show all posts

Tuesday, March 12, 2013

Adepticon Style Team Tourny at Millennium: Game 1

Last Saturday was the monthly tournament over at Millennium games in Rochester.  This month it was an Adpeticon style team tournament.  So, my brother and I decided to team up and play Guard & Blood Angels.  The tournament featured a modified force org for each 2 player coalition member.  They used the Adepticon scenarios Road to Nowhere, Over the Top, and Doomsday Device.

Our lists were as follows:
Konrad: Imperial Guard 1000pts

HQ
Lord Inquisitor: Power Sword, Melta Bombs, & Camo Cloak
Elites5 Ogyrns: Chimera w Heavy Stubber
TroopsVeteran Squad: 3 Plasma Guns, Power Sword, Chimera w Heavy Stubber
Veteran Squad: 3 Melta Guns, Demolitions, Power sword
Fast AttackVendetta Gunship: Door Heavy Bolters
Heavy SupportManticore

Garrett: Blood Angels 1000pts

HQ
Librarian: Force Axe, Jump Pack, Codex Powers: Shield of Sanguinius and Unleash Rage
Elites
Furioso Dreadnought: Blood Talons, Melta Gun, Flamer, Drop Pod w Storm Bolter
Troops
Assault Squad: 10 Marines, 2 Plasma Guns, Power Fist
Assault Squad: 10 Marines, 2 Melta Guns, Hand Flamer, Power Axe
Assault Squad: 10 Marines, 2 Flamers, Hand Flamer, Power Sword

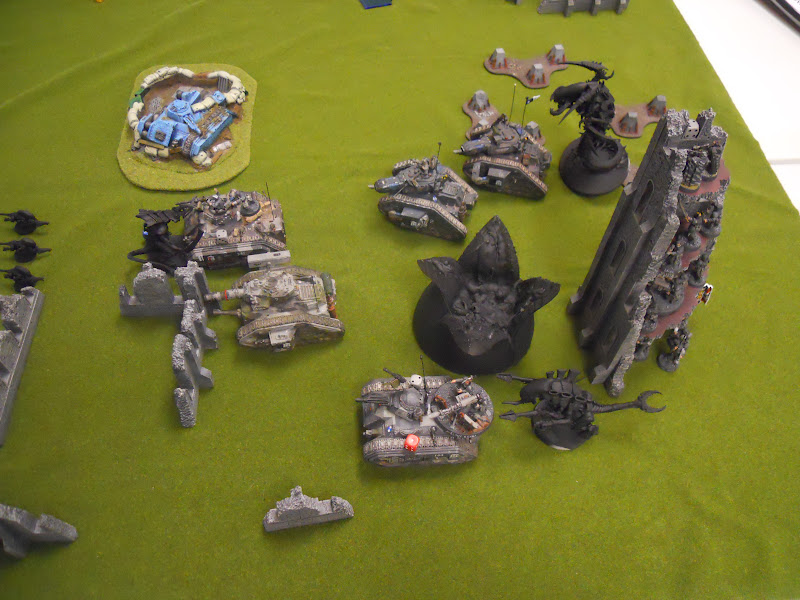
Our plan was to have him bring the disarray and close combat pain by deep striking all over the place and to have my Guard bring in the fire-support and backfield mobility with the vets and vehicles.  Also, the Ogyrns allowed me to have my own backfield CC support if needed.  In our practice game we faced a double Chaos list and ended up losing, so that put some doubt to our plans.  We decided not to change anything anyway, and just see how it goes.

GAME 1: Space Marines & Grey Knights

The scenario for the first game was called  Road to Nowhere and featured the Vanguard deployment.  The first Primary Objective was to hold table quarters, doesn't seem too bad, but you need a scoring or denial unit from each team member to score or deny respectively (15 Points).  The Next objective was Victory points with each scoring unit being worth 1 VP and each non-scoring unit worth 2 VP (10 Points).  Secondary Objectives were Slay the Warlord, First Blood, and Linebreaker, each worth 1 Point.  Each scenario featured a Twist of fate for each team member which could be used for a single reroll, a special effect, or saved for 1 Point.   This game the twist of fate allowed each team member to assign a scoring unit to capture a quarter on its own.  We each assign this to one of our troops, me to my Melta Vets in the Vendetta and my brother to one of his Assault Squads.

Our Opponents lists were:

Gray Knights:
HQ
Grand Master: Incinerator, MC Daemon Hammer, Blind Grenades
Elites
10 Purifiers: 4 Incinerators, 2 Halberds, Hammer
Troops
5 man Strike Squad: Psycannon, Razorback w psybolts & Searchlight
Fast Attack
Stormraven Gunship: Hurricane Bolters, Psybolt Ammo
Heavy Support
Dreadnought: Autocannons, psybolt ammo

Space Marines: Crimson Fists
HQ
Librarian: Terminator Armor, Storm Shield
Elites
Ironclad Dreadnought: Seismic Hammer, Hvy Flamer, Meltagun, Drop Pod
Troops
Tactical Squad: 10 Marines, Powerfist, Meltagun, Multimelta, Rhino
Tactical Squad: 10 Marines, Combi-Plasma, Plasmagun, Plasma Cannon
Fast Attack
Stormtalon Gunship: Twin-Linked Lascannon
Heavy Support
Thunderfire Cannon

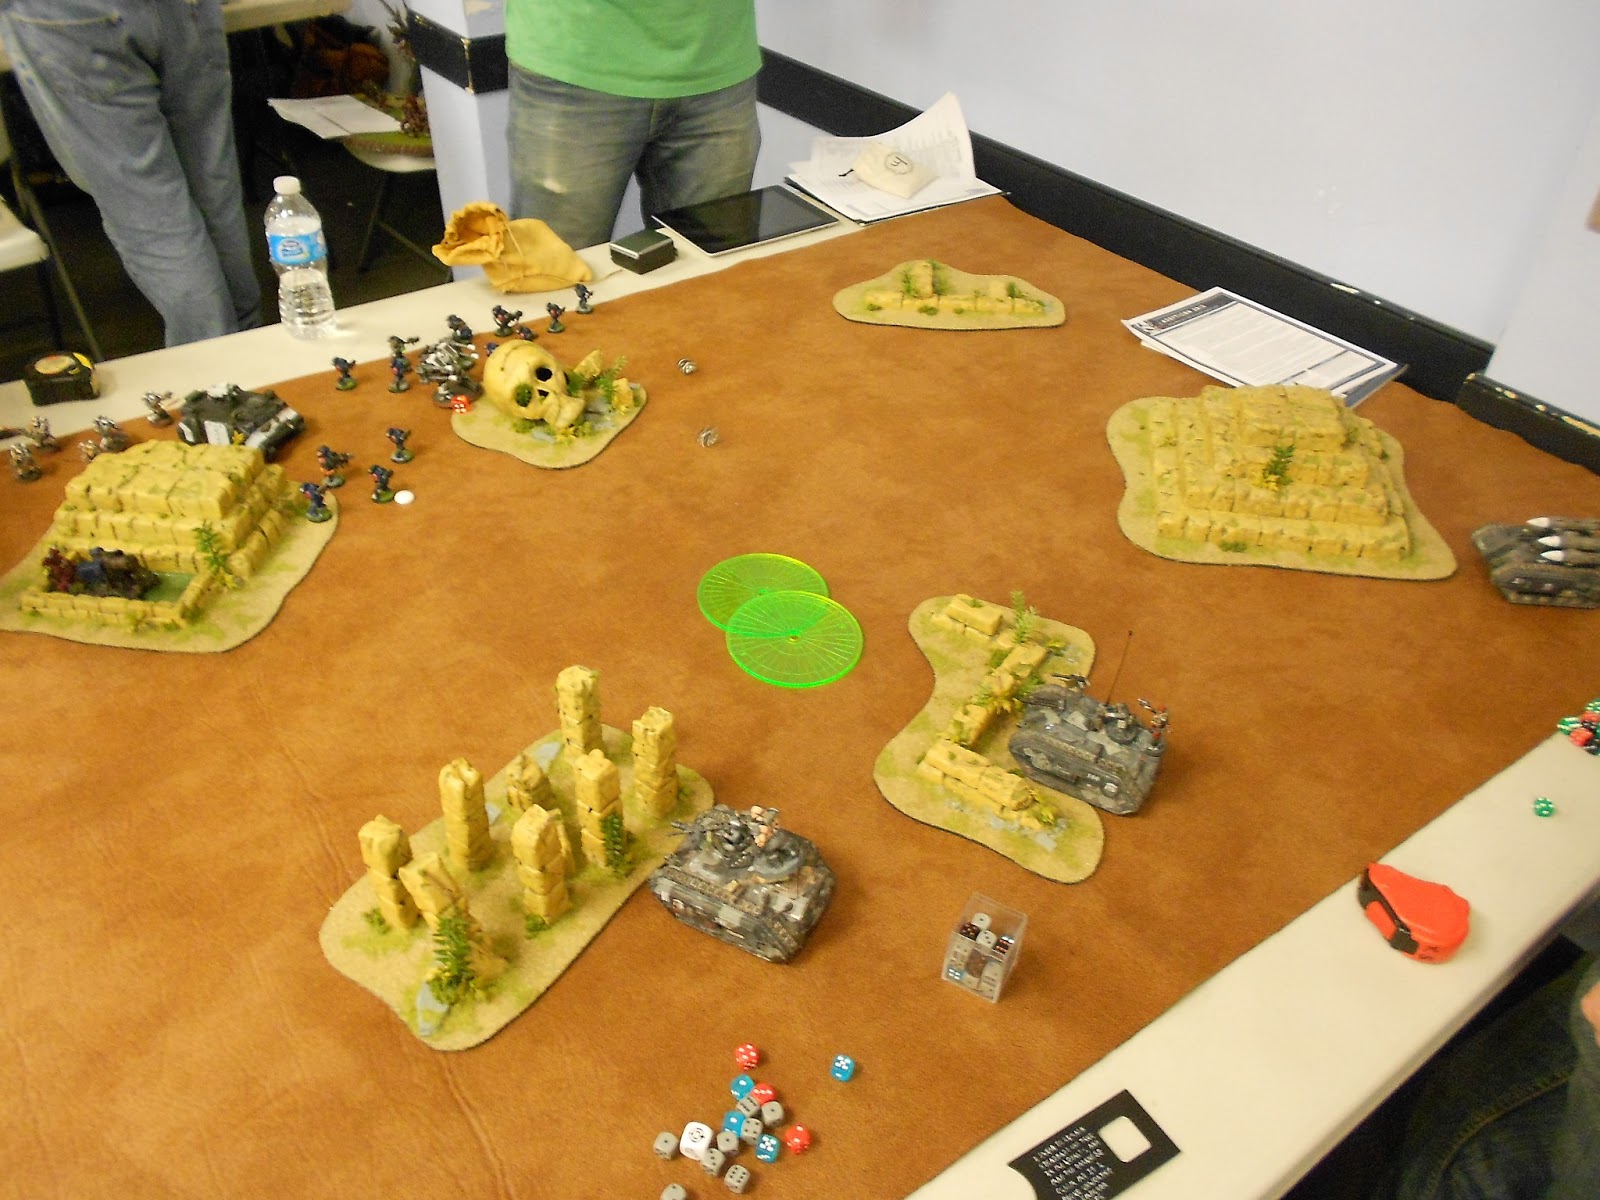
So, we set up terrain as seen below.  For warlord traits we choose my Lord Commissar and I roll on the strategic column.  I get acute senses for our outflanking units, which is only my Vendetta. My brother and I got first turn and there is night fighting turn 1. Here is the deployment, there is a Rhino to the left containing a tactical squad.


In the movement phase I move up the Chimera with the Ogyrns to the columns, I also deek (deke?) the Manticore to get LOS on their deployment.  Garrett's drop pod scatters and ends up delayed.  Not much to shuffle around until more arrives from reserves.


Not much to do for shooting either, the right Chimera opens fire on the Tactical squad ahead of them.  I don't do any damage.  I then fire the Manticore at them and wind up taking 1 HP from the rifle dread and kill a couple of marines.


On their turn Andy's drop pod arrives but mishaps which allows us to place it. The Rhino on the left moves up towards us with the dread and the Knights in the center shuffle up a bit.  Shooting from the Thunderfire takes out 2 HP on the Chimera on the left and leaves it Shaken.  Not a lot of action this turn, but things are just getting started.

Turn 2 and the deep strikes begin.  Garrett puts 2 assault squads that arrived on the right side of their forces and the dreadnought on the left.  My Vendetta comes in and is positioned to fire anywhere inside of their deployment.

Garrett's Furiso fires at the rear of the Ironclad but fails to do any damage.  The manticore fires at their center again and kills the Rifle dread, as well as a hull point on the Razorback. The Chimeras strip 2 HP from the advancing Rhino.  The Vendetta fires at the Ironclad but also fails to inflict any damage.  Finally, the Assaut squads open up on the Grey Knights and Kill most of them.


For their turn the flyers fail to arrive and so they don't have much to move around. Tactical Marines shuffle around and the librarian's unit preps for assault.  The Crimson Fists Rhino moves up on our left flank and the Ironclad shuffles to engage the Furioso.  In the shooting phase they take out a bunch of assault Marines with the Thunderfire but Garrett passes all leadership and they hold fast.  In assault the Ironclad does a HP on the Furioso.


Turn 3 and Garrett's last assault squad show up to try to take out either the Thunderfire or the Tac marines behind the ruin.  I move up my Vendetta to try and take out the troops inside the Rhino. The Ogyrn Chimera advances with the same intent. In shooting, the assault marines on the left fail to do much and the ones to the right inflict a few casualties.  The Chimeras fail to pop the Rhino and so I have to use the Vendetta to finish it off.  The Ogyrns then fire at the survivors and all but 2 are killed.  The Manticore fires at their center again but only manages to strip a single HP from the Razorback.  In the assault phase we lose the Furioso to the Ironclad dread but the assault marines finish off the Crimson fist Tac squad leaving only the librarian and a few strike squad.


Their turn 3 is when things start to get painful, both of their fliers arrive!  The Stormraven heads for my manticore and drops off the combat squaded Purifiers, the Storm Talon heads for my Vendetta.  The survivors from the Rhino move into cover.  Shooting starts and the pain begins.  The Vendetta falls to the talon, failing all jink saves.  All but 1 of the vets inside are killed in the crash, but he immediately gets killed by  the razorback.  The Manticore is blasted by the Stormraven, but it got off 3/4 shots, so that is not too awful.
The Tac squad and Ironclad manage to take out some of the assault marines on the left side.  The Ogyrns lose their ride to I think the Thunderfire.
The other assault marines with the librarian manage to strike some vengeance and wipe out the strike squad, leaving their warlord alone in combat.  However the Ironclad locks combat with the left side RAS and only a few remain.


Turn 4 and we really don't have much to shoot so we don't do any damage.  The assault marines engaged with the Ironclad get caught again but do not die.  The ogyrns assault the tactical marines but end up fleeing.

On their turn they manage to pop the Vets Chimera as well as the drop pod.  The Ironclad locks up the Assault Marines... again.  They just can't get away.  However the Terminator Librarian is slain and we get the Slay the Warlord Secondary Objective.


In turn 5 the Vets shuffle up in the ruins and they manage to snapfire the Storm Talon away.  We also take out their Razorback but our output is too low at this point.  The wreckage comes down and and takes out a few of the veterans in return.
 In their turn the Ironclad finally finishes off the assault squad and the Storm Raven takes out a few of the marines from one of the other squads.


In the end we wound up with 3 points for getting all 3 secondary objectives.  Aaron and Andy took away 26  for taking both Primaries as well a linebreaker.  This game really went to show how influential fliers can be, zooming around causing havoc and destruction with little retribution.  Once their fliers were in they really started doing massive amounts of damage.  After this game we had some doubts about what we would be able to accomplish with this list, it was 2 straight losses if you count the practice game.  It was a fun game overall though, didn't feel overly lost and probably could have done some things better to ensure more units survived.

Thursday, September 13, 2012

Battle Report: September 8th Tournament: Game 1 Imperial Guard Vs Tyranids 1850 Pts


This month's Warhammer 40,000 tournament at Millenium Games in Rochester, NY was last Saturday.  The format was rulebook 40k, pre-set or 'cinematic' terrain if you like, and 1850pts.  No comp, no painting, the only goal here was to win.  Well, win and have fun.

I usually try to make a balanced list or go with something less utilized.  This month I went with something I have found to always be reliable.  The Leman Russ Tank.  Specifically, the Executioner variant as it very rarely fails me when I use it and I always take it with plasma cannon sponsons and a hull mounted lascannon.
The night before the tournament GW dropped the FAQs upon us and the Leman Russ became a Heavy Vehicle, which helps out with a lot of the variants.  I do like the change, even with the lack of movement over 6 inches.  I think the old lumbering behemoth was very characterful.
Here's my list!

Imperial Guard:
 HQ
Company Command: Power sword, med-pack, Standard, plasma gun, Vox, & 2 bodyguards

Troops
Veteran Squad: Demolitions, 3 Meltaguns, Power sword
Veteran Squad: Grenadiers, 3 Plasma Guns, Power Sword
Chimera: Hvy Stubber
Veteran Squad: Sentries, 3 Sniper Rifles, Lascannon, Vox
Veteran Squad: 3 grenade launchers, lascannon
Chimera: Heavy Stubber

Fast Attack
Vendetta Gunship

Heavy Support
Leman Russ Squadron
1>LR Executioner: Plasma Sponsons, Lascannon, Heavy Stubber
2>LR Executioner: Plasma Sponsons, Lascannon, Heavy Stubber
LR Battle Tank: Heavy Bolter Sponsons, Lascannon
LR Vanquisher: Lascannon, Multi Melta Sponsons

My opponent for game 1 was my friend Chris, who drove me to the tournament, and his tyranids:

Flyrant
Trygon
Tervigon
Shooty Carnifex Duo
Shooty Carnifex(In pod)
3x Warriors
1x Hive guard
10x guants
Tyranid Prime

Game 1 used the Hammer & Anvil deployment and Big Guns Never Tire for scenario.  My warlord trait gave my outflanking units acute senses I do no recall what Chris' did.  We roll and get 3 objectives, he places 2 and I one.  Here's our terrain set up.

I get first turn and deploy as seen below; the Vendetta and the melta vets are coming.  I put the snipers in the ruin and the objective turns out to give a +1 to cover, meaning they gain 1 2+ cover save while camping the objective.  I wish I could get this every game I played.  The command is on the floor below them to issue orders and guard against assault.  Everything else deploys to advance and crossfire.


Here is Chris' deployment.  The Trygon and pod Carnifex are in reserve.  He fails to seize but we do have night-fighting for turn 1.

Turn 1

I advance the Grenade vets in their chimera and the Leman Russ Battle Tank, keeping everything else stationary.


In the shooting phase I put almost everything I have at the Carnifex team, between everything I score a lot of hits, and he makes a good amount of saves but I still end up killing one and putting 3 wounds on the other.  I also put 2 wounds on the Prime from splash and I think kill 1 gaunt.


In his turn he spawns a unit of 15, the maximum without doubles.  He moves up the gaunts, prime, and remaining fex.  He casts some boons to them, I think increasing the toughness or some such.  The fex shoots at the Chimera and manages to stun it.


Turn 1 Summary: Guard 3 (Objective), Nids 6 (2 Objectives)

Turn 2

First I roll for the Valkyrie and it does indeed arrive.  I advance everything but the Grenade Launcher Chimera and the objective holders.  
In shooting I finish off the carnifex gaining First Blood and since it is a Heavy it gains me 2 Victory Points.  The vendetta shoots at the Tervigon and does 1 wound.

On his turn all of his reserves arrive the flyrant comes in from his end.  The carnifex and trygon come in on my side.  Of course, everything else advances.  He spawns 12 guants this turn, still no doubles.


The fex shoots the rear of my other Chimera and stuns it.  The pod shoots and my command squad and kills bodyguards.


In the assault phase the prime charges in on my GL vet Chimera and blows it up.  The squad holds its own in the cover  I lost 3 scrubs.


Turn 2 Summary: Guard 5 (First Blood, Heavy Kill, Objective), Nids 7 (2 Objectives, Linebreaker)

Turn 3

I make another on the near table edge with the Leman Russ, going for the linebreaker.  The lower chimera rotates to face the fex, the executioners turn to face the trygon, the vanquisher turns to face it as well, and the Vendetta turns on the flyrant.


This turn I take out the tervigon, put some wounds on the flyrant and on the carnifex.


It was the first aerial combat of the day.


The tyranids advance again and he spawns 14 more guants. The carnifex moves in on my command squad.  Shooting from the flyrant takes the vendetta down a hull point.  The pod manages to wreak my other chimera.


In the assault phase the fex goes into my command squad, the guants attack my dismounted plasma vets.  The fex is downed by my command but the guants take out the veterans.  The same squad that turned back a unit of reavers a few months ago.


Turn 3 summary: Guard 7 (1 Objective, First Blood, 3 Heavy Kills), Nids 7 (2 Objectives, Linebreaker)

Turn 4

I move the vendetta towards the corner and dismount the Vets with Grav Chute Insertion, they do not scatter and none of them die.  

Shooting does little damage this turn I think I manage 1 wound on the tervigon and 1 on the flyrant.

On his turn he advance gaunts towards my Melta vets and the flyrant at my Executioners.  He shoots at the vets and kills a few and then assaults the Executioners to little effect.

Turn 4 Summary: Guard 8 (1 Objective, First Blood, 3 Heavy Kills, Linebreaker), Nids 7 (2 Objectives, Linebreaker)

Turn 5

I forgot to take any pictures this turn but it mostly involves me killing the flyrant.  He returns fire and kills a couple more veterans from the melta squad and some from the sniper squad with the pod.

Summary

In the end this game was pretty close, at first we thought it was a draw because we forgot to count each heavy killed as another Victory point.  I had some very good rolls this game, and my shooting was especially effective.  In the end I wound up with 10 VP; 3 for my objective, 1 for linebreaker, 1 for First blood, 1 for slay the warlord, and 4 for Heavy kills.  Chris came up with 7; 6 for objectives and 1 for linebreaker.

Mt next batrep may be up next week and will detail the events of my first battle against Daemons.

Thursday, May 31, 2012

Dust Warfare: The First Fight

The following is a recap of my first game of Dust Warfare.  It was my Axis against Kevin's Allies.  We played 150pts.
Our lists were as follows:
Axis Sturmgrenadiere Platoon

Command Section: Kommandotrupp
1st Section: Battle Grenadiers
2nd Section: Battle Grenadiers
3rd Section: Heavy Recon Grenadiers
4th Section: Laser Grenadiers
Support Section:  "Luther" Medium Panzer Walker

Allied Combat Platoon

Command Section: Ranger Command Squad "The Boss"
1st Section: Combat Rangers Squad "The Gunners"
2nd Section: Combat Rangers Squad "The Gunners"
3rd Section: Assault Rangers Squad "BBQ Squad"
4th Section: Heavy Ranger Tank Hunter Squad "Tank Busters"
Support Section: Medium Combat Walker M2-A"Mickey"

We decided to use the table to make our mission as opposed to using one of the pre-built missions.  If we're going to try out this game, we're going to try out everything.  Going through this process we came up with the deployment type "Close Engagement" with the objective "Eliminate the Enemy" and no special conditions. We deployed between 6 and 18 inches from our respective board edges and rolled to see who would go first.  I ended up with 2 hits and Kevin with 3.  So I started the game with 2 orders.  Here is our deployment.  Not having much idea how this was all going to work out, or how to play the army we both started with pretty much everything in cover and mostly out of range.


For my command phase I gave a Blitzkrieg order to the Battle grenadiers by the bunker and advanced them behind the laser grenadiers.  I have my command squad move up as well and they get a reaction token.  Not knowing too much since I did not have the rules to review I placed my command poorly and not all of my units fall within its influence.  Oh well.  Another he


I missed a picture here for Kevin's command phase.  He had three orders.  The first he uses to try and call a "Long Tom" Artillery strike against my command squad (because it contained my painted officer).  It missed.    
The last was used on the Mickey to take a shot at my Luther, he missed.

In my combat phase I advanced the Blitzkrieging Grenadiers to behind bunker I and shot my Panzerfausts and Panzershreck at the Mickey.  The Panzershreck scores a hit and does 2 damage!  Causing an external fire.  Next I move up the Heavy Recon Grenadiers towards the bottom of the screen.  They fire at the BBQ squad in the emplacement there and manage to kill 3 of the 5. I then move up the Laser Grenadiers and fire at the Ranger squad below the Mickey.  They manage to Kill 1.  The Luther Shoots at the Mickey but misses.  The second Grenadier Squad moves forward 3".


Kevin begins his turn by taking out some hardcore vengeance on my Grenadiers which shot his Mickey.  His command squad shoots at them and takes three of 'em out.  The Mickey puts out the fire.  The Ranger squad near it removes a suppression marker and shoots at the Laser Grenadiers with their UGLs and rifles, they fail to cause any kills.  The Tank Busters fly out to behind the wrecked scout car and blow up my Heavy Recon Grenadiers.   This leaves the remaining infantry with nothing to shoot at.


This initiative phase I roll 2 hits and Kevin 1.  He gets to go first.  He again attempts to Long Tom my HQ, this time he succeeds.  The strike takes out one of my Kommadotrupp.  It also hits against the Grenadiers near Bunker I and suppresses them.  I Blitzkrieg order the Panzershreck to take another shot at the Mickey, it misses.  I then order the Laser Grenadiers to shoot at the nearest Combat Rangers and manage to pick one more of them off.
The Combat Phase brings me more pain.  The Mickey begins shooting at my command squad killing another member.  His HQ finished off my Battle Grenadiers near bunker I as well.  I lose a Laser Grenadier to the Ranger Squad they just shot at.  Worst of all the Tank Buster roll up and destroy my Luther with a single salvo!


My combat phase is pretty uneventful as the tide has really gone against me now.  My Laser Grenadiers manage to pick off a single Ranger.


Turn 3 sees Kevin and I both roll 2 hits and so we reroll and I get a 1 to his 2.  I use my one order to have the Laser Grenadiers Blitzkrieg and shoot at the Rangers again.  They manage to pick off 2 more.  Kevin calls in a Long Tom strike on my Grenadiers near the Luther Wreck and kills 1.  His other order is used on the Mickey which continues to pummel my HQ. Leaving only my Radio guy alive.  The autumn cover of his helm blended in with the blood of his fallen comrades.  Really it's because the Mickey did not have LOS to him and you can't kill what you can't see.
The combat phase sees the Laser Grenadiers kill another Ranger, leaving one alive.  I move the remaining Battle Grenadier squad back into cover.  Kevin makes a general advance.  The lone Ranger is suppressed enough that he is forced to fall back.  The BBQers move up and smoke a Laser Grenadier and the Tank Busters enter close combat with my Battle Grenadiers.

 
Turn 4 and I am all "Game over man!"
The fight must go on until the last man has fallen though.  So we roll for initiative.  I roll no hits and Kevin gets 1.  My order is spent telling command that the Obereutnant is dead and the radio man is in command.  Kevin calls in the Long Toms on my Battle Grenadiers but it does no harm this time.

Combat phase sees kill a single Tank buster as I move out of combat and not much of anything else as I try and hold in cover and just survive a little longer.  Kevin takes the laser Grenadiers down to 1 man with the BBQ squad.


Turn 5 and Kevin rolls 1 to my none.  I Blitzkrieg my radio man to the back of Bunker II.  Kevin Long Toms the Grenadiers.  Combat phase sees me shoot my radio man at the Tank Busters and try to Laser a BBQer.  It also sees Kevin wipe the Axis forces from the table and sweep on to victory.


So, that's that.  I lost this game of "Dust Warfare"  but that's not to say I did not enjoy it.  It's rather fun and I enjoy it more than I did Warmachine.  Here's a list of some things I liked and did not like.

Pros:
-Can be played rather quickly at this point level if you are more familiar with the rules than we are.
-The hit system simplifies shooting and helps speed things up
-I like the phases and rolling for initiative each turn.
-The allied and axis special orders Long Tom and Blitz Krieg seem to be balanced. With the arty strike having great reach and firepower, but Blitzkrieg allowing you to really put a good unit to extra use at a key point in the game.
-Pretty cheap to get into.


Cons:
-Cover feels a bit wonky to me.
-There's no such thing as durability, things die pretty easy.
-Warfare should have unit cards.
-Moving only 3 inches in terrain is rough.

Overall I had a positive experience and we have ordered the started set for yet more models, expect a table update and another Dust Battle next week.  I did work on the table last Sunday, but it was mostly just spraying on a several coats of clearcoat to protect it during use.  Not very post worthy.  I also had to fix the water, but you can see that next time.  Also look for a post on some more painted Dust models!