Another slack ass post. Been working on things slowly. I've got a Wotan and some BFG ships on the bench for now. Just been a busy month. Unfortunately I have missed Gothicomp again.... I suck
Oh yay, post 100.
Hang in there for 100 more?
Wednesday, September 30, 2015
Wednesday, September 2, 2015
WH40k: Cadian Rough Riders
Hello again faithful readers. I am going to present to you today the reason I had to post a filler post the other week. I have finally finished the Rough Riders. I have posted several work in progress posts on these guys in the past, from the time I built the first guy to the time I painted the horses. Last weekend was the Buffalo Beef and Wing Brawl. A local singles, highlander tournament held by a the Beef and Wing game club. It's always a blast and this year it was the only tournament I attended. So, I finally had a true reason to push these through as painting is judged.
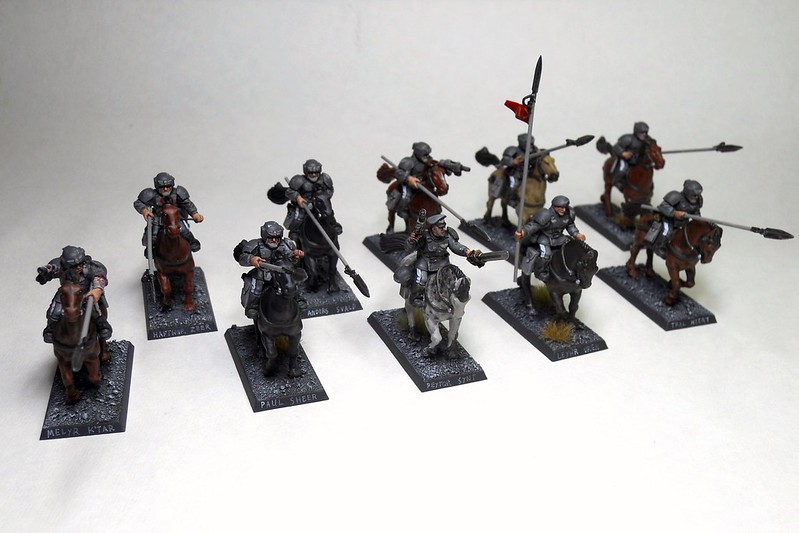 |
| The entire squad. |
I have always wanted to have a cavalry squad, despite how poor they are cost wise. Point for point I am better off using something else, but it's guys riding horses in the year 40,000 anf they have explosive lances. They're just too 40k to pass up.
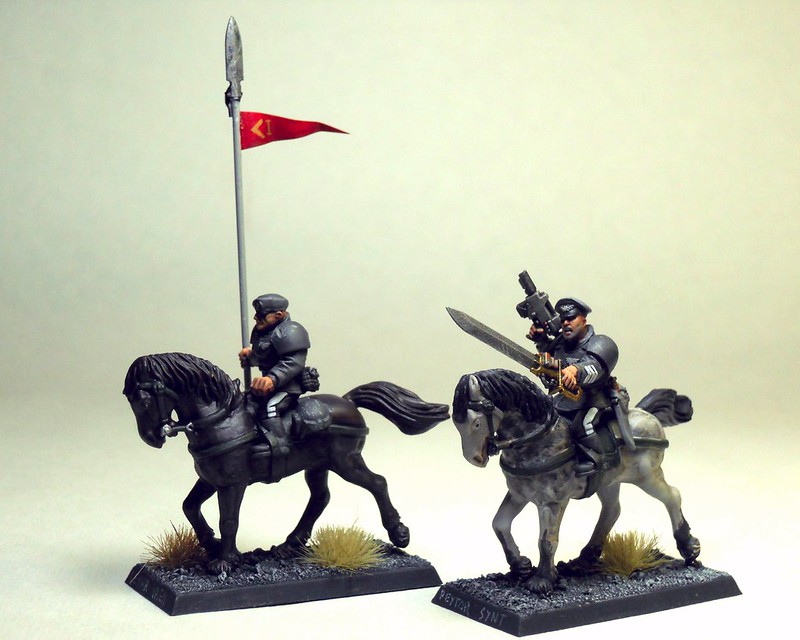 |
| Standard bearer and Sergeant. No real rules for the flag but hey, it looks cool. |
Painting the horses was a challenge as I have never had to paint anything remotely similar. I tried to add variety with the sergeant having the fanciest looking horse. That said I feel now I could have done a better job.
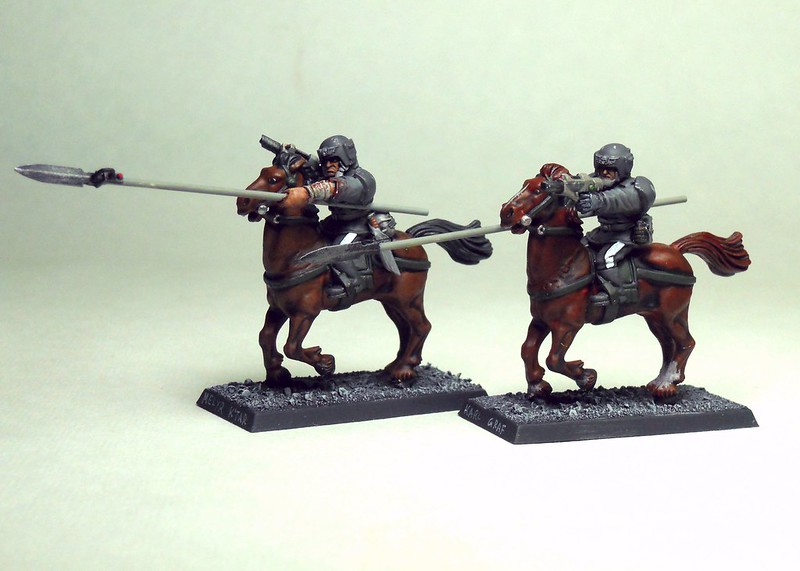 |
| These guys are also holding their pistols. One has a wounded arm and the other a bionic hand. |
One thing I think I have improved during painting this squad is the process for infantry flesh. I wrote down what I did so that I can repeat it and I think that of all of my squads they have the best flesh.
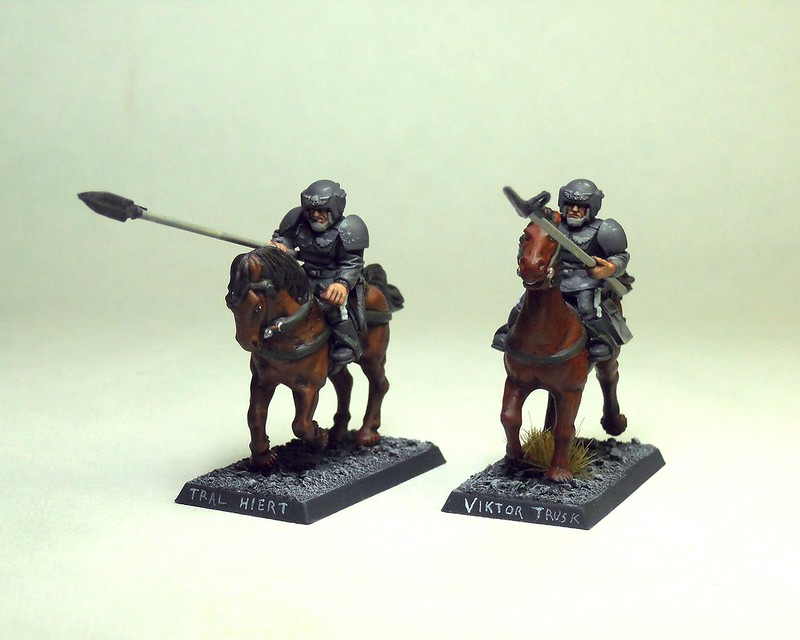 |
| Magnetized riders with lances. |
Two of the riders have megnetized arms allowing them to carry their lances, meltaguns, or plasma guns. I scratch built all of the lances from some skeleton spears and plasticard. The legs I bought from Curious Constructs.
 |
| With Melta guns. |
 |
| With plasma guns |
Wednesday, August 19, 2015
Filler
First time in a rather long time that I have nothing new to post. The Rough Riders are one night away from done but I did not get to work on them as I got set back about 3 hours today. I will most likely finish them Thursday or Friday. Until then. The Emperor Protects....
Wednesday, August 5, 2015
Review: Grex TG3 Combo

So, finally, I decided to step up and get a new compressor. Originally I was going to buy a tank compressor from a hardware store, but I really need a quiet compressor where I am living now. So one day I stopped by my local hobby shop and talked to the owner about the grex kits he had in stock. He was kind enough to let me try out the set he bought for himself and showed me some of the work he had used it for. I really liked the pistol grip and got a sense of the sound the compressor generated.
With this in mind I told him I would be back the next week with the cash. I will not lie, this set is not cheap, but he gave me a little bit of a discount, which I greatly appreciated. About the price though, if you are seriously into this hobby, and really want a nice airbrush, buy this thing.
The compressor is very nice and quiet, it was less noisy than my TV at about 1/3 volume levels. Next it has an automatic shutoff, so when you're not spraying, it stops running. The hose is nice and flexible and does not hinder hand movement. The attached pressure regulator and moisture trap are a great feature and something my old compressor did not have. It's got suction cup feet which help dampen vibration and thus more noise.
Moving onto the airbrush. This product is awesome! The grip is so comfortable and easy to control, even for fine details. This is one thing I was originally apprehensive about, will I get the same amount of control as I do out of the stylus? Absolutely, and with more comfort! All of the parts come apart super simple for cleaning and the pin is easy to change. Paint comes off of the stainless coating very nicely. At least acrylic, I have not tried it with enamels or oils. The adjust-ability of air and paint flow are great and you can go from base colors to fine line details in a few seconds. The kit includes a quick detach for the brush that has another pressure regulator which helps facilitate this. What I do is adjust the pressure at the compressor to suit the paint, then use the one at the gun to adjust more finely for spray area size. These QD attachments are also available for other brushes and I bought one for my Badger Anthem as well.
All in all I say it's well worth it, and soon enough you will be seeing some of the results I have had using it. Stay tuned!
Wednesday, July 15, 2015
Terrain: River Renovation Part 1
Another two weeks gone by and another post. Over the past few game nights I have been working on renovating the river on our gaming table. Over the years it's been getting a bit rough, the resin did not dry correctly last time and some paper got stuck to it. After that I used some water based water effects to cover it and it was just an ugly brown sludge. It's always been my least favorite part of the board, not the idea of having it, but the execution. There's a shot of the original below.

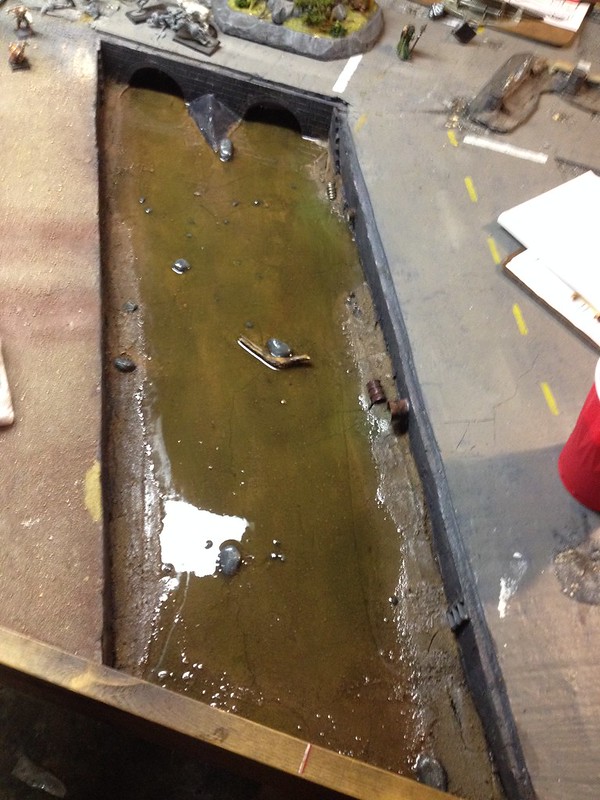
I neglected to take any process shots of this, but the first thing I did was lay down a riverbed out of plaster. Into that I pressed some different sized stones and some debris. After that I textured it up a bit and added some paint. I sprayed a clearcoat after I was done and let it dry for a good 2 weeks so it would not interact with the resin. I wanted to be sure as sure this time.
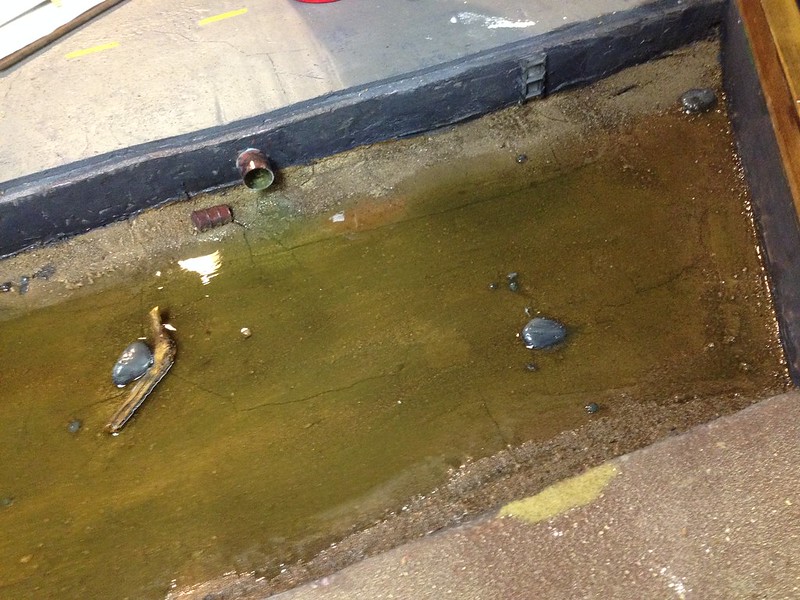
I added a bit of debris, some wood, jerry can, spring, barrel, and some discoloration around the outlets.
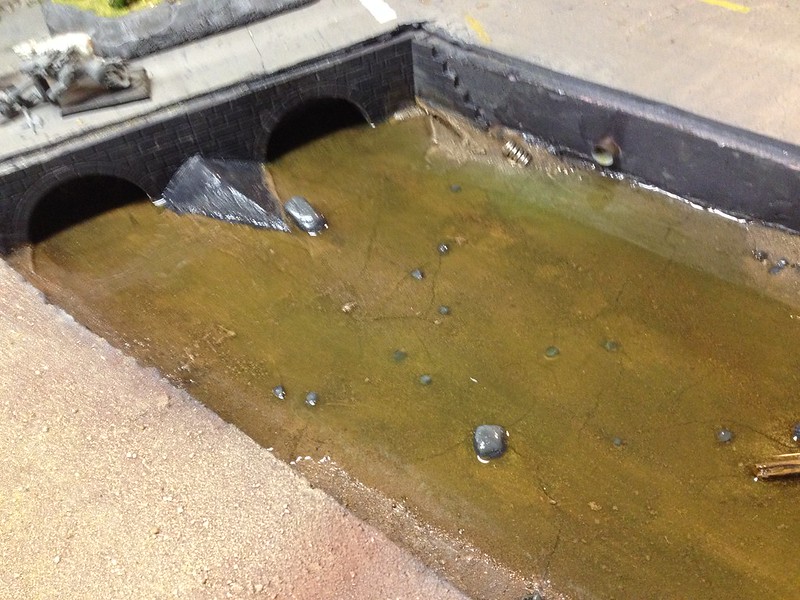
I still have to add some effects and ripples to the top around all of the obstructions. I am also going to have water running out of the outlets coming from the city side of the board. Stay tuned, when it's all done I will make another post.
I neglected to take any process shots of this, but the first thing I did was lay down a riverbed out of plaster. Into that I pressed some different sized stones and some debris. After that I textured it up a bit and added some paint. I sprayed a clearcoat after I was done and let it dry for a good 2 weeks so it would not interact with the resin. I wanted to be sure as sure this time.
I added a bit of debris, some wood, jerry can, spring, barrel, and some discoloration around the outlets.
I still have to add some effects and ripples to the top around all of the obstructions. I am also going to have water running out of the outlets coming from the city side of the board. Stay tuned, when it's all done I will make another post.
Wednesday, July 1, 2015
WH40k: WiP Cadian Rough Riders
It's been awhile, but the blog has finally caught up to me. I don't have a finished model to post this week. That's not to say there is nothing! I have here a long in coming squad of Cadian Rough Riders squad which I have been working on for a rather long time. I started converting the first one in 2012!!! You can see a post about that HERE. I've posted about them here and there since then, but now they are finally getting some much needed paint!

Not being a Fantasy [R.I.P.] player, I've never had to paint any horses before, so that's where I started working here. I finished them in April or so and then having to do base layers on the riders has caused me to stretch out painting them ever since. I loathe doing base colors. Today I finally finished the base colors and even threw a wash on. I hope to keep rolling along and finish them by next week. That way I can start a new project before the next blog post.

I think I have mentioned it before but they are going to be magnetized to allow for some variation, if I ever use them that is. Stay frosty!
Not being a Fantasy [R.I.P.] player, I've never had to paint any horses before, so that's where I started working here. I finished them in April or so and then having to do base layers on the riders has caused me to stretch out painting them ever since. I loathe doing base colors. Today I finally finished the base colors and even threw a wash on. I hope to keep rolling along and finish them by next week. That way I can start a new project before the next blog post.
I think I have mentioned it before but they are going to be magnetized to allow for some variation, if I ever use them that is. Stay frosty!
Wednesday, June 17, 2015
Dust Warfare: Silent Death
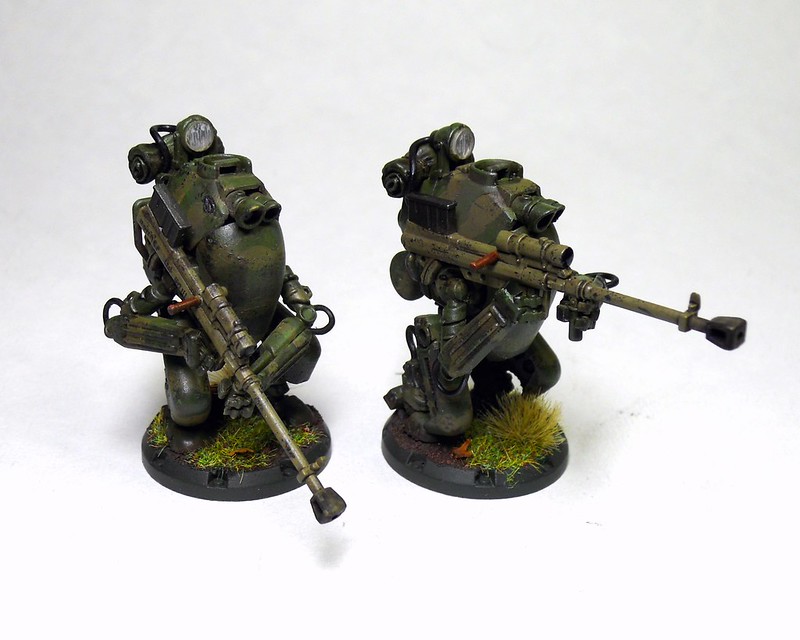
These Steel Guards models have always been some of my favorites. Mutilated veterans given a chance to fight again for the glory of their Motherland. Encased in the heaviest of armor and given the most powerful "infantry" weapons they would go and avenge themselves. Some people like these models others don't. I think they are awesome. This is the Steel Guards sniper team and they are armed with man portable semi-automatic cannons.
 |
| Target sighted and annihilated. |
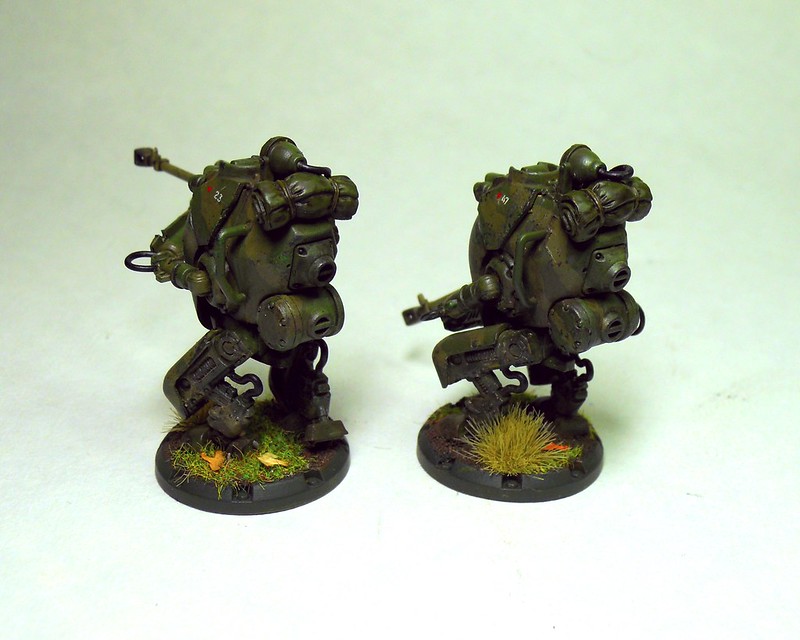
Hope you enjoyed. I did have a bit of trouble with the white balance on the last image, but I think it turned out okay.
Wednesday, June 3, 2015
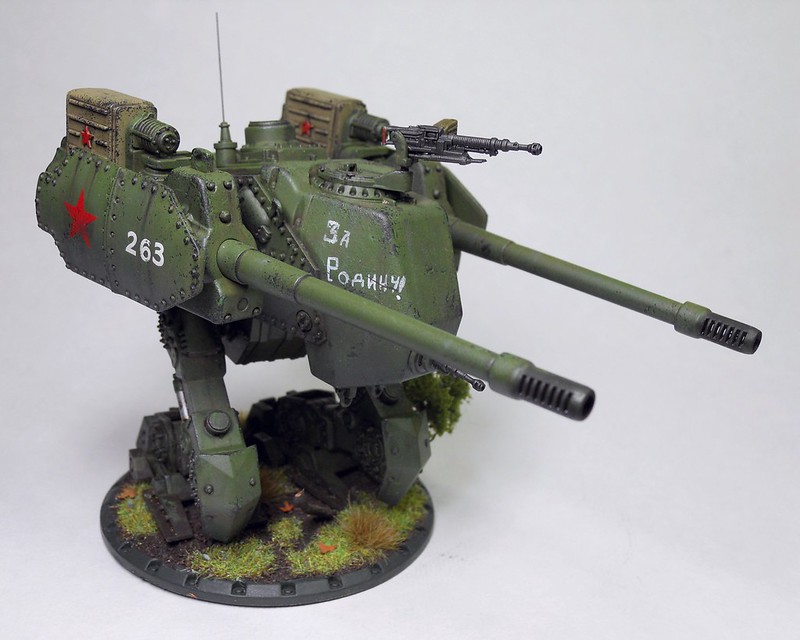
Dust Warfare: KV-3 Heavy Walker
Here is the Soviet heavy walker KV-3. Along with the Wotan it is one of my favorite units in the game, both visually and in use. It's a hard hitting and survivable unit, and it looks good doing it. As usual with the Dust kits they come pre-built. However you will spend the time you would have been putting it together to fill, file, and clean all of the mould and seam lines. Kinda a pain really. A lot of it would be easier if you built it yourself. The primer that it comes pre-coated with usually works out well though.
Also, they don't include any decals other than some stenciled markings, which I paint over anyway... So, I got some Soviet markings and lettering/numbering from my favorite hobby shop Section 8. Below you can see the version with the dual 152mm cannons because if one is good two will be better.
Hope you enjoyed the view. You may notice these pictures are a bit better quality than the earlier posts this year. This is because I finally got a daylight worklamp and added it to the photo setup. This shows the colors much better with little to no retouching on Aviary. Before I had to tweak the contrast, saturation, and brightness to get a decent turnout. This had varying results. The new lamp is great, so expect much nicer photos going forward.
Just check out this reshot picture of the Panther from my last post and I think you can see the difference this light really makes. Brings out the truer colors and details much nicer.
Also, they don't include any decals other than some stenciled markings, which I paint over anyway... So, I got some Soviet markings and lettering/numbering from my favorite hobby shop Section 8. Below you can see the version with the dual 152mm cannons because if one is good two will be better.
 |
| "Matrioshka" |
 |
| I used AK washes and grimes for the weathering. Had to buy more of their white spirit since other thinners don't seem to cut it for the streak marks. |
 |
| I kind of regret not putting a star on the front, as I had with the KV-47 Aero. |
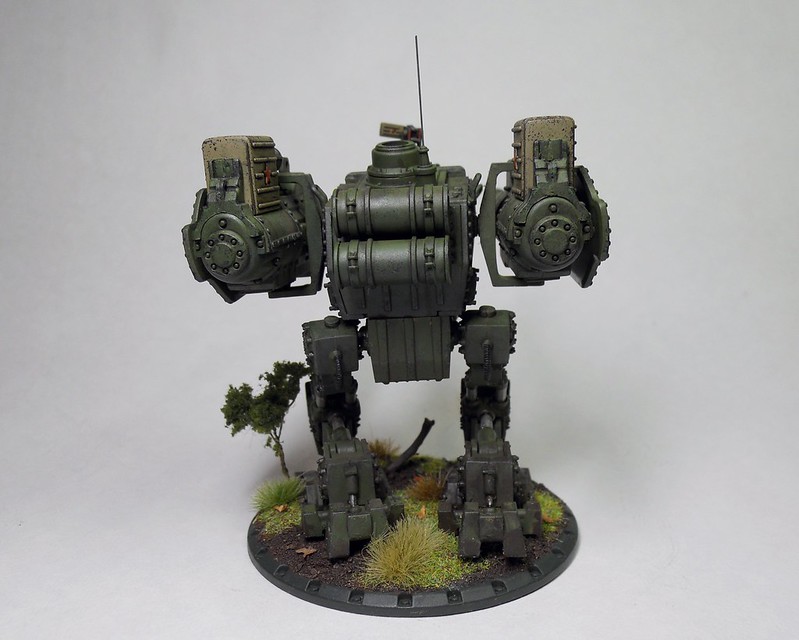 |
| I did not add any extra stowage as I do with my German walkers. |
 |
| Though this scheme is simpler than my German camo, it does involve color modulation. So, it takes about as long as painting the camouflage. |
 |
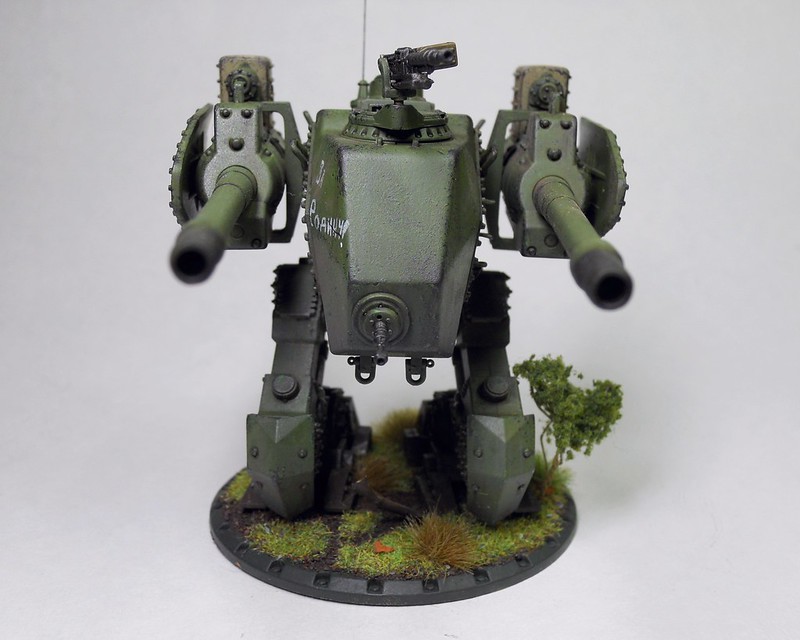
| Here is the other version, with dual heavy Gatling cannons. "Babushka" |
 |
| "For the Motherland!" This picture also shows off the texture I added to the front portion of the hull. I gave it a cast look with some Tamyia Mr. Surfacer. It's great stuff. |
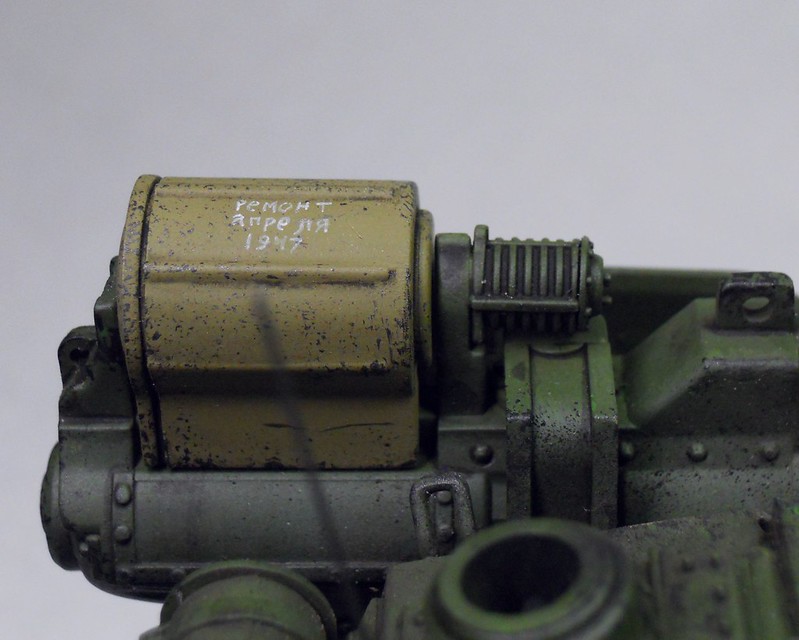 |
| "Repaired April 1947" |
Just check out this reshot picture of the Panther from my last post and I think you can see the difference this light really makes. Brings out the truer colors and details much nicer.
Wednesday, May 20, 2015
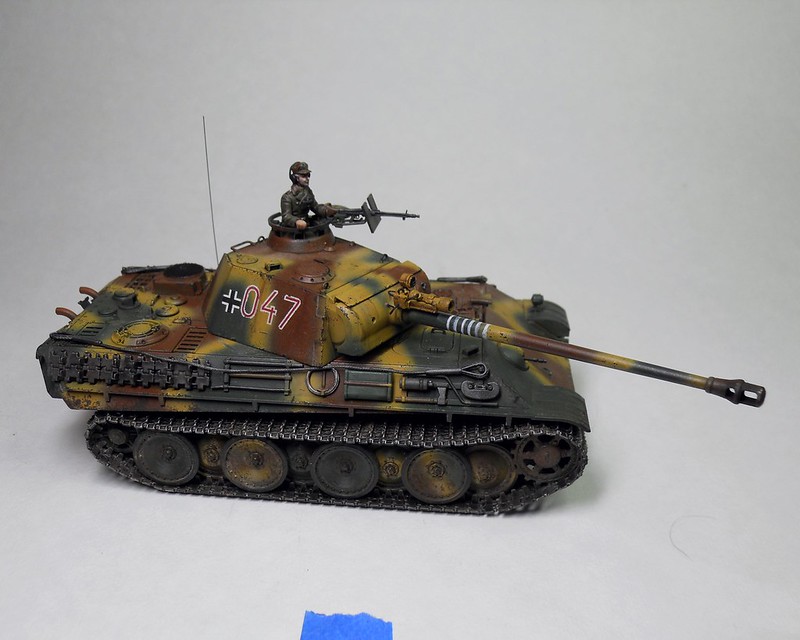
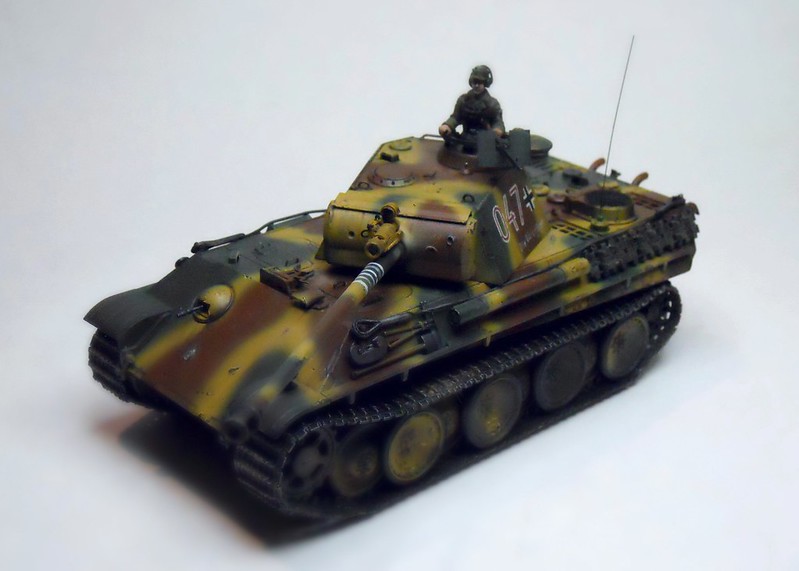
Scale: Panther Ausf. G
Here we have another scale model which I have modeled with my Dust Warfare axis in mind. This time a 1/48 Tamiya Panther Ausf. G. Or rather a Panzerkampfwagen V Panther Ausführung G. I still have another one of these to build along with a Tiger II, but they are out of production. Unfortunately this scale did not prove popular enough with many modelers. There are no rules for this tank in game, nor have I tried to make any up as of yet, but surely I will at some point.
The main thing I have done to try and make this take look a little less typical is add the Infrared scope, which was an early form of night vision. I got this off of one of my Axis walkers and tweaked it to fit as seen.
 |
| I used a hot piece of wire to melt a couple of dents into the frontal armor. It bulges up the edges quite nicely. |
 |
| This kit comes with a die cast metal lower hull, which gives it a nice heft when assembled. It also includes a braided string to assemble to tow cables and allow them to lay more naturally. |
 |
| One thing on the kit I was not happy with was the exhaust guards, the plastic was just too thick. To remedy this I used them as a form and shaped my own from thin sheet copper. This allowed them to be thinner, but also dent them up a bit. |
 |
| I assembled the tracks with the wheels all unglued for painting and got them spot on the first time around. Unfortunately I ended up dropping them. I dropped one and it took some time to fix. Once it was done I promptly knocked the other off the work table so it too could explode. They just would not line up right the next few times I put them together. It took a couple of hours of work to fix them. Only about 30 minutes for original assembly. I was ready to throw the whole thing against a wall. |
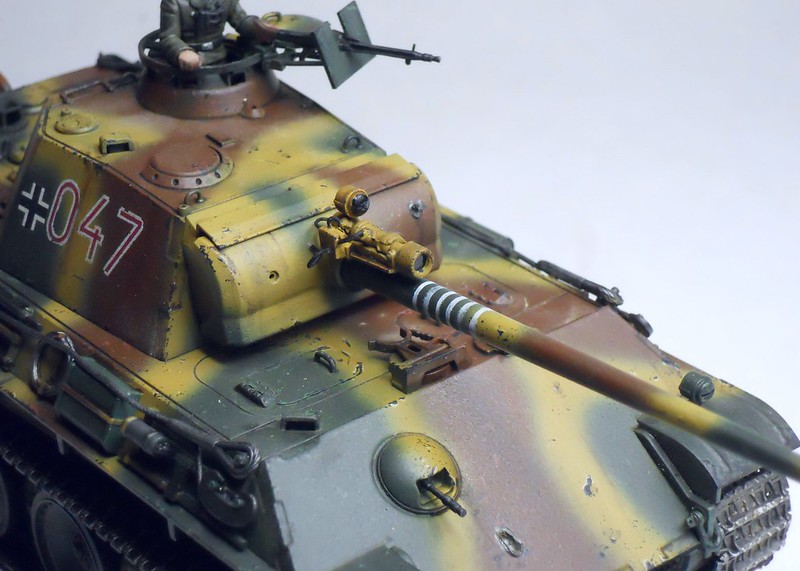 |
| Here you can see some kill markings and the IR scope. |
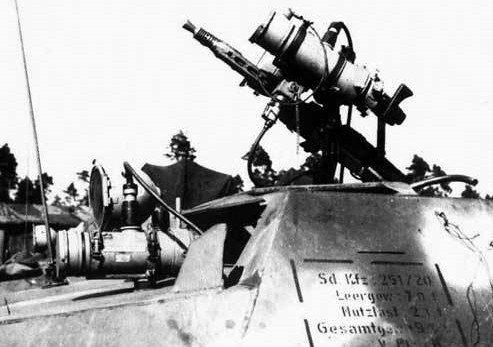 |
| The scope is based on real German wartime technology, which was actually mounted on Panthers, though not as above. I figure in Dust they have the 1 above the gun with screens inside that the crew can share. Here you can see the real thing, an infrarot-scheinwerfer. |
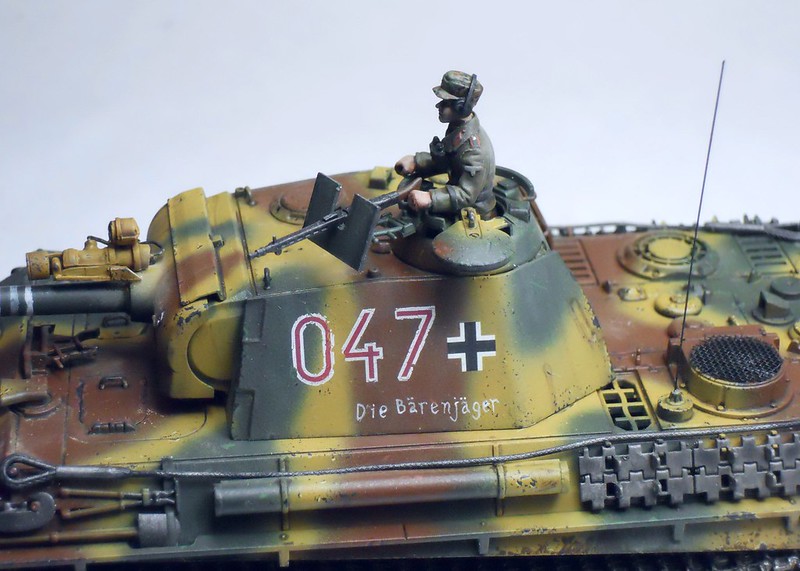 |
| The tank is called Die Barenjager or "The Bear Hunter." As in Russian bears, this tank fights on the eastern front. |
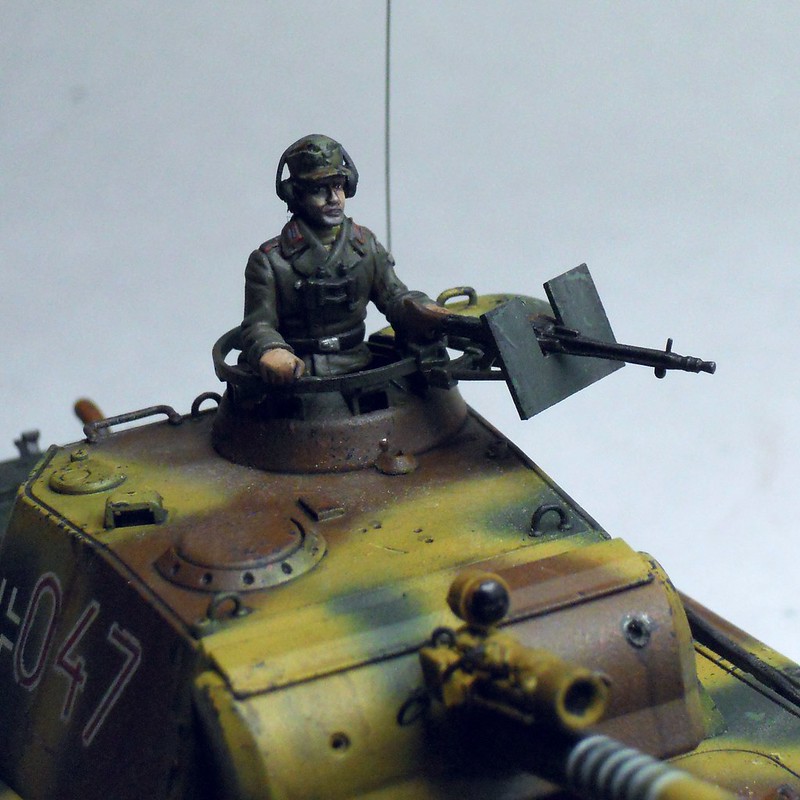 |
| Here's the commander, who is part of a set of resin commanders I got from Verlinden. I added the radio headset and binoculars. I actually painted the hat and pants in flecktarn, though it is hard to see here. The MG has been updated to an MG44 with a gunshield. |
Wednesday, May 6, 2015
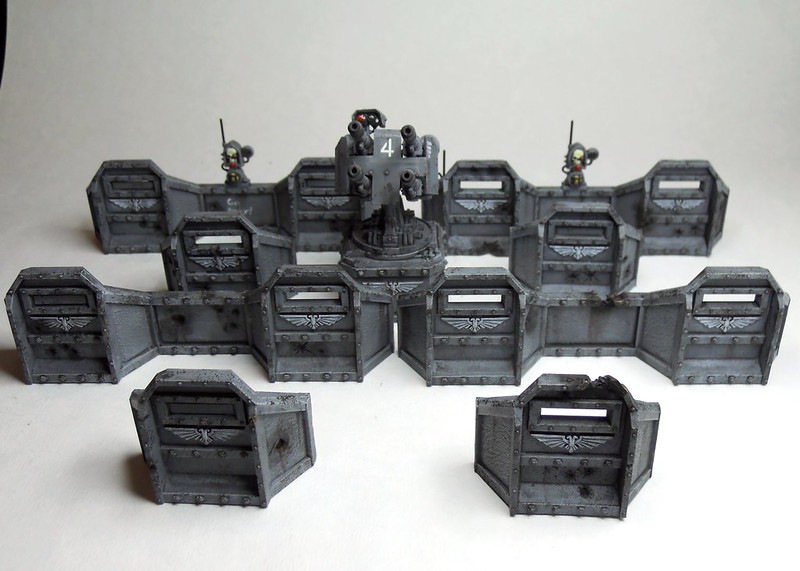
WH40k: Aegis Defense Line
All that infantry needs some protection, so I've painted up my Aegis Defense line to help keep 'em all alive. I have not used this set too often, but I really like the look of it and the quad autocannon. I think I put this together and did all of the modelling work some time in 2013. I went and did a lot of battle scarring and added a bit of details to the set to make it seem more unique. Most notable on the walls I've used plasticard to show some of the shutters as being closed.
I spent a lot more time painting this than I had planned. For terrain I usually just try and keep it simple. I ended up doing all sorts of washing, grime, and pigments. I think it was worth it.
More pictures after the break.
I spent a lot more time painting this than I had planned. For terrain I usually just try and keep it simple. I ended up doing all sorts of washing, grime, and pigments. I think it was worth it.
More pictures after the break.
Wednesday, April 22, 2015
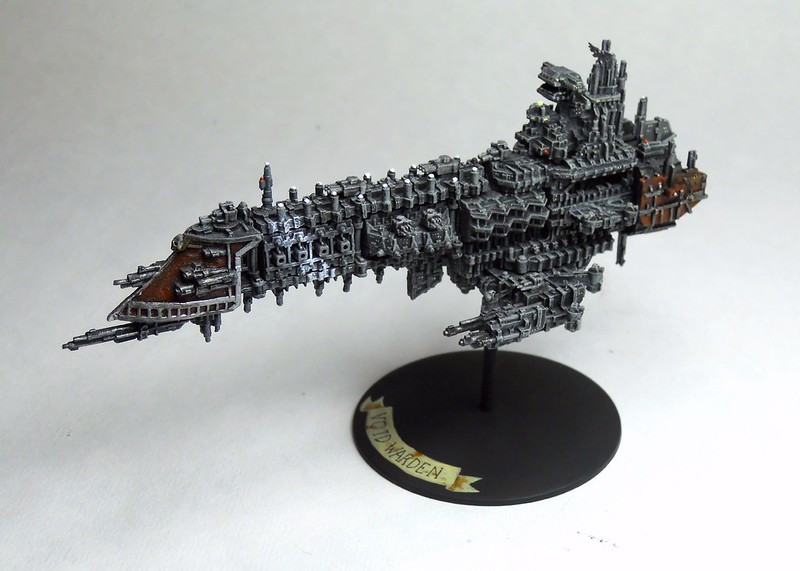
BFG: Oberon Battleship
Another Battleship for the fleet. This time an Oberon class. I know, not the most competitive, but I'd like to have one ship of each class. I still have an Apocalypse class and an Ark Mechanicus to paint up, so that will do it for my Battleships eventually. Anyway, let me present, the Void Warden.
I tinkered with the bridge a bit on this one and instead of one of the crazy huge figureheads added an Admiral's Bridge with an etched brass aquila above on the communication masts. I used some chaos lances on the dorsal line since those are my favorite style of turret by far. Lastly it's got a huge stripe to denote it as the fleet command ship. As if this visual cue would be necessary with all the codes she'd be blasting out into space. Another note is this is the first battleship where I replaced the stem with 1/8 inch brass rod. No more breaking!
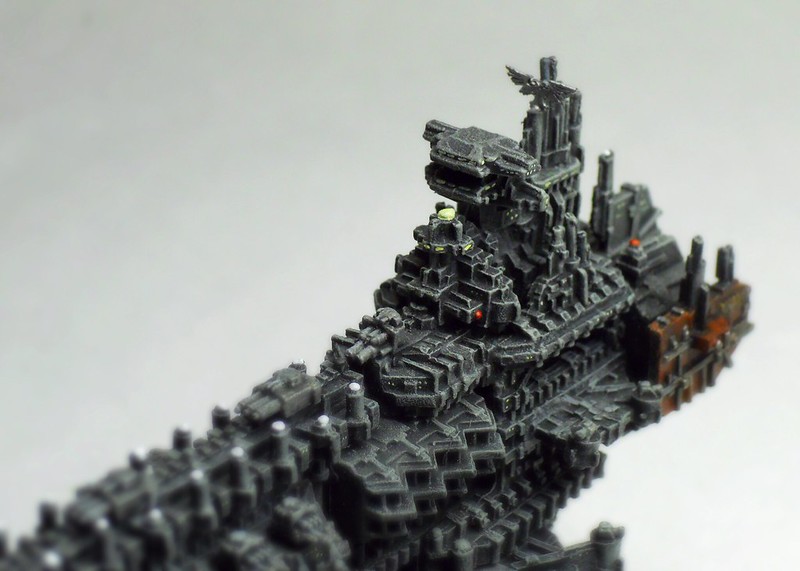 |
| A close up of the bridge(s). The Admiral's bridge is part of a Chaos bridge. Does this mean I can ignore the first Bridge Smashed result? |
Thursday, April 2, 2015
Let 'em Burn!
I hope you didn't really think that I was serious about ending the blog.
Here's a quick filler post. Last August I made some tealight smoke markers. Hard to take a picture of, but I'm sure you get the gist.
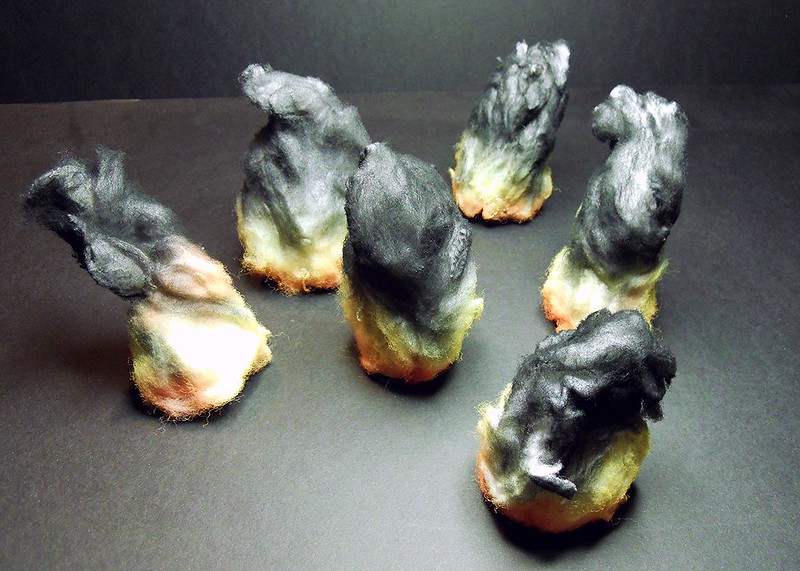
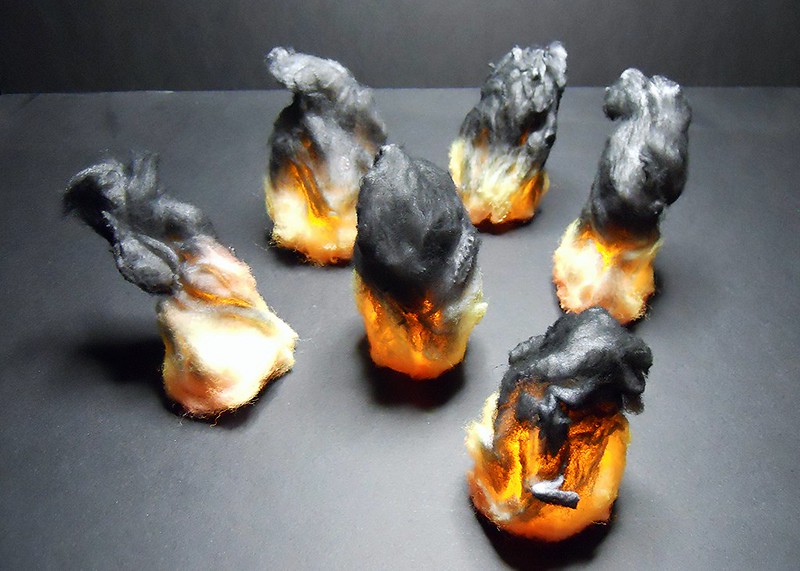
You can obviously use them on or off, but it's just so much more cinematic with them flickering. I've got 6 more of the tea lights but I need more stuffing before I can make any more.
Here's a quick filler post. Last August I made some tealight smoke markers. Hard to take a picture of, but I'm sure you get the gist.
You can obviously use them on or off, but it's just so much more cinematic with them flickering. I've got 6 more of the tea lights but I need more stuffing before I can make any more.
Wednesday, April 1, 2015
Dust Warfare: Frontoviki
More Soviet infantry this week. Again these were painted in late 2014, I just never took pictures. These guys are a Soviet Battle Squad. Frontline infantry, but they come with some decent firepower in the form of their 2 machine guns. They are not Red Guards like the last unit I posted, so they are equipped a bit differenty. Most noticeably their armor looks different, but also they wear a simpler and more utilitarian looking uniform. I went with a Soviet styled amoeba camoflage for their coveralls and Russian Green for their helmets and armor. I started chipping the armor with sponges on this squad and went back and did it on the Red Thunder. I still need to do so to my Axis units as well.
I've got 2 continual complaints on the Dust infantry models. One is the soft plastic and the other is a lack of detail in most of the facial sculpts that makes them a bit difficult to paint. I do enjoy the overall look of most of the units though, so I am more than happy to deal with these two, perceived flaws.
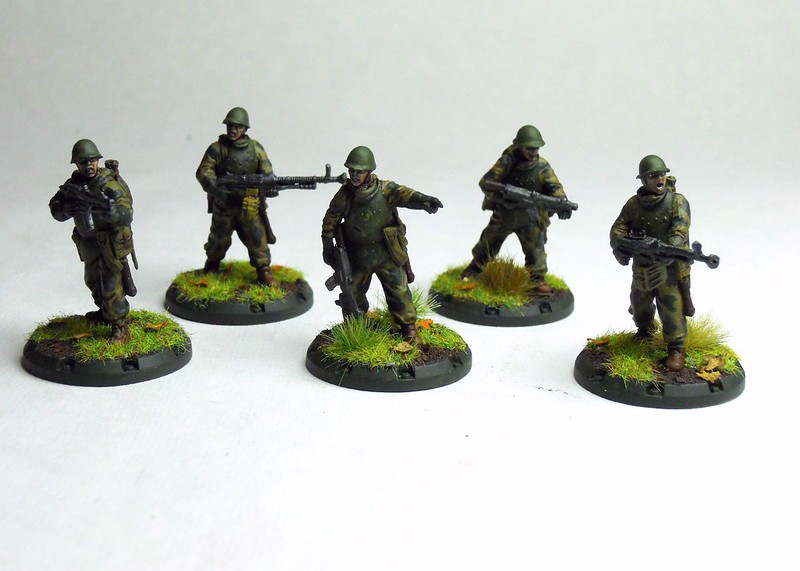 |
| Sergei says shoot that way. |

Unfortunately, this could be my last post on the blog. It takes a lot of extra time to take so many photos and I've had less time for the hobby in general. It's been a nice ride anyway.
Wednesday, March 18, 2015
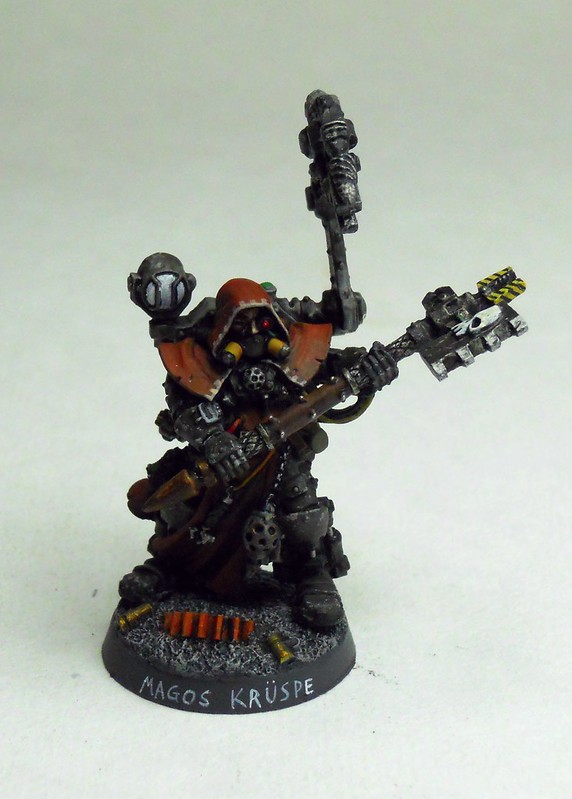
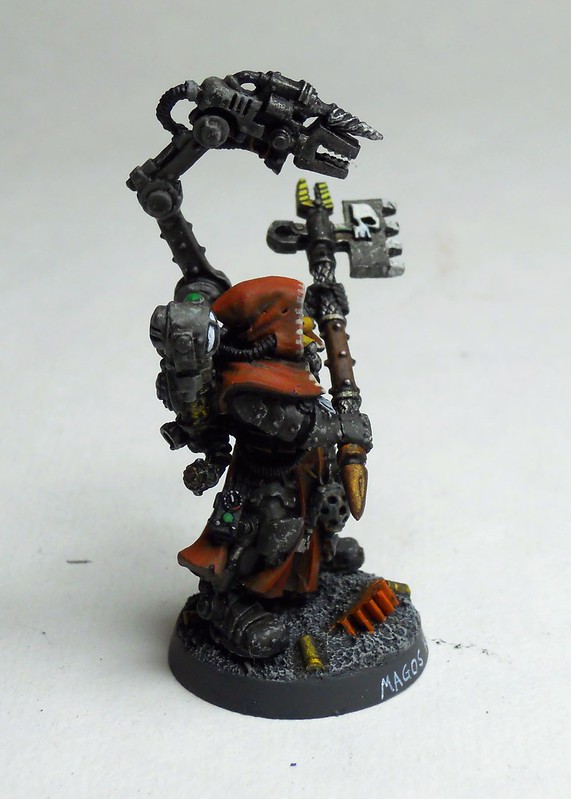
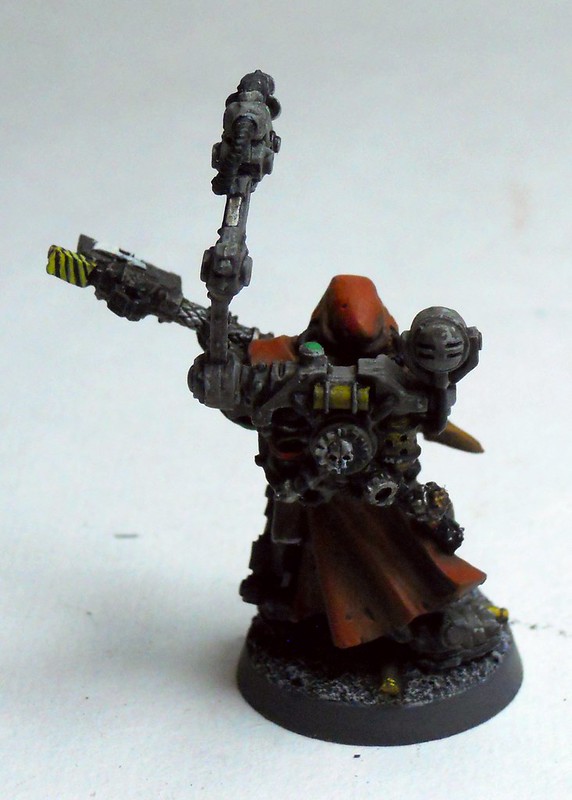
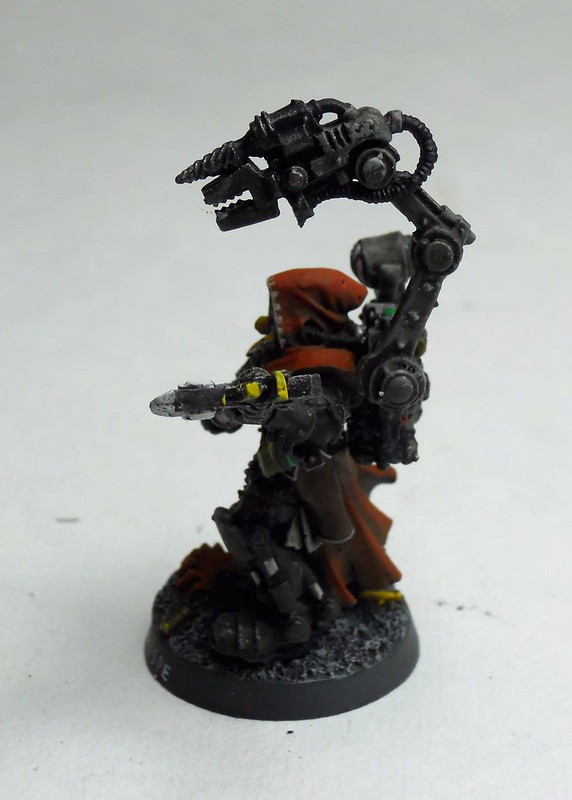
WH40k: Techpriest Enginseer
Ave Dues Mechanicus! The Cadian 125th Armored Division finally has someone to fix all of those tanks they drive around and blow stuff up with. This is another model I have been meaning to paint and use for some time. It's even made of metal, not finecast. I really enjoy painting characters and such as a standout from the gray of my infantry. On the tabletop this model should stand out from the blobs and add some nice color to the army.
This model took me several nights of work to complete with all of the shading I did and the details there were to pick out. His armor matches the gray of my army, but is heavily chipped with the sponge method. Again, I really need to improve my photos. They've been coming out a bit darker than I like. It may be that my work bulb is getting a bit long in the tooth.
The one thing I don't care for is how the caution stripes turned out on the end of his axe.
Wednesday, March 4, 2015
BFG: Mechanicus Battlecruiser
Another Battlefleet Gothic update, this time with a Mechanicus ship. I've had this model for a very long time and it's been primed black for years but I've just recently painted it up. I painted it shortly after I completed the two Imperial cruisers and stuck with drybrushing and washes.
If I remember correctly it's modeled as a Mars Class Battlecruiser, appropriate, I suppose. I put a bit more detail into this one to make it more characterful. There's also a bit more contrast between components than with my Navy ships. The Mechanicus sigil on the sides of these ships is a great touch from GW. I came up with the name Voidfarer, as I did not want something that really made it sound too much like a warship. It's actually named after my extrasolar probe I made in Kerbal Space Program to escape the sun. A true explorator.
 |
| More stripe markings on this one. They just add a nice bit of flair. |
 |
| I added a cog-wheel pattern around the sigil on the front. |
 |
| I also tried out some heat scoring on the engines. I do like how it looks though I am not truly sure whether or not to implement it on my Navy vessels. |
Wednesday, February 18, 2015
WH40k: Ministorum Priest
With the release of the new Imperial Guard codex, priests got a bit better for sure. This model is my brother's priest from an Inquisitor campaign we did years ago. I agreed back then to paint it for him. It may be hard to tell, but the robes are wet-blended brown like a monk's robes. It actually started out as a rusty red but the years showed their wear and it was really chipped. I could not match the color and I was about to paint a Techpriest next so I switched it to this brown. This model really was nice to finally finish painting after almost 6 years.
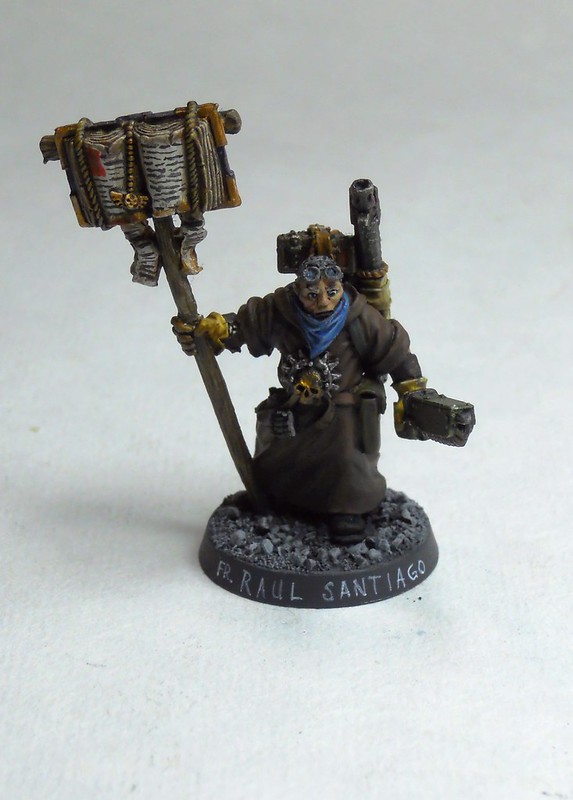 |
| His name is Fr. Raul Santiago and back in the campaign he had quite the penchant for being set on fire. Poor guy. |
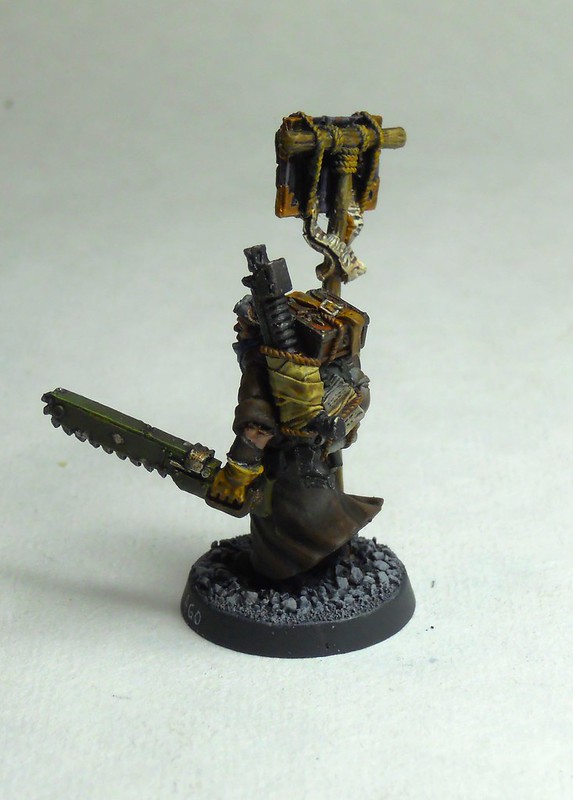 |
| The chainsword is still as it was when I first painted him years ago, as is the book staff. |
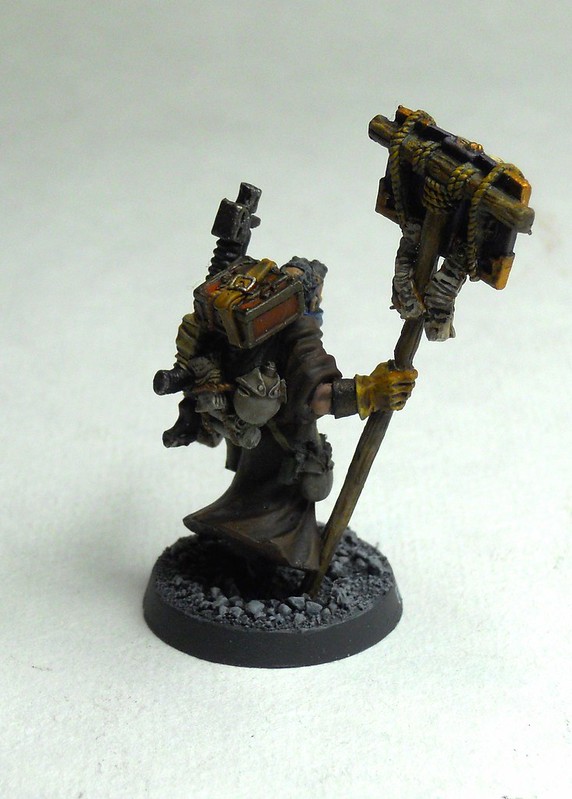 |
| He has a lot of nice details on the backpack. All sorts of weapons and gear and books. Lots of books. |
This set of pictures really shows that I need to upgrade the lighting I use or upgrade my camera. Or both. We will see what I buy first.
The Emperor Protects!
Subscribe to:
Posts (Atom)