Showing posts with label river. Show all posts

Wednesday, July 15, 2015

Terrain: River Renovation Part 1

Another two weeks gone by and another post.  Over the past few game nights I have been working on renovating the river on our gaming table.  Over the years it's been getting a bit rough, the resin did not dry correctly last time and some paper got stuck to it.  After that I used some water based water effects to cover it and it was just an ugly brown sludge.  It's always been my least favorite part of the board, not the idea of having it, but the execution.  There's a shot of the original below.


I neglected to take any process shots of this, but the first thing I did was lay down a riverbed out of plaster.  Into that I pressed some different sized stones and some debris.  After that I textured it up a bit and added some paint.  I sprayed a clearcoat after I was done and let it dry for a good 2 weeks so it would not interact with the resin.  I wanted to be sure as sure this time.


I added a bit of debris, some wood, jerry can, spring, barrel, and some discoloration around the outlets.

I still have to add some effects and ripples to the top around all of the obstructions.  I am also going to have water running out of the outlets coming from the city side of the board.  Stay tuned, when it's all done I will make another post.


Monday, May 21, 2012

Building a Gaming Table [Part 4]

Here we are again with another update on the gaming table!  This week was really painting heavy with lots of drybrushing and some detailing too.  First I started with painting the desert/waster part of the table.  We used craft store paints to do this, a medium brown, then a light brown, and finally a tan.  I also painted up the corresponding dunes and one of the wreck markers in the same colors.


Here's a shot of it complete, with light highlights in the areas that I built up with the clay.  I also resprayed with the dark brown spray paint in the path where the bridge crosses the river.


Next, I drybrushed the urban parts of the board.  Used the same craft paints but a medium gray and a light gray.  Did all of the drybrushing with a cheap 2 inch natural, soft brush.  They're basically the cheapest you can get at Home Depot but are very forgiving on the amount of paint on the brush and cover very well for this application.


I then painted the roads with the medium gray, but more solidly.  I also mixed the medium and light grays to varying hues to add some variations to the road.


Once that was done it was time to detail the road.  This started with detailing the craters with some light gray highlights and some soot marks.  It also involved adding some lines to the road.  Had to start by masking them off.


Then I painted them on unevenly with some yellow paint.  When I do lines like this I don't paint it to cover it completely but only lightly so it looks worn out.


Here we see the results of this with some stop lines added as well.  The river's base colors were also done and the resin mixed and poured in.  I have some water based water effects which I will make look muddy and add to texture the surface more.  Should also make the water look more natural and dirty.


Here's a shot of what I have done so far.  I also painted the "Techno Bridge" while waiting for the river's paint to dry.


So, should have everything pretty much wrapped up by next time.  Cup holders, finish the river, seal the whole thing, and add some static grass spots.  It will need to be stained as well but my brother is going to do that while I work on terrain.  Finishing all of our terrain and building more will be the next big step for this project.  That's already begun in my other series New Table, New Terrain!

Thanks for stopping by.

Friday, May 18, 2012

Building a Gaming Table [Part 3]

Now for another installment of this series.  Got a lot of work done this week, lots of glue and sand and paint involved.  I got to do some work on Sunday as well as Thursday of this week, unfortunately I forgot my camera both days, fortunately Kevin has an iPhone and it takes a decent photo.

First up the clay lifted a bit due to shrinkage,  I had not really run into this problem using this clay on smaller areas and I bought it since it said minimum shrinkage.  However, most of the areas I put it lifted and separated completely from the foam.  Nothing a little bit of Elmer's glue could not fix though.


So, after those were all glued down I got to work mixing up some sand and various sizes of ballast to make the flocking mix.  Also mixed a couple of bottles of Elmer's with some water to glue it down with.


Then it was time to paint on the glue and pour the sand mix in as well.  It's important that you tape off the sides before you start this because any wetness on the sides would have kept the tape from sticking and would interfere with staining later on.


Whenever I do flocking I tend to really pour the stuff on, it's better to have too much than too little.  The added weight helps keep it in place while the glue sets and helps more flock actually get worked into that glue.


This leaves us with a table that looks like a sandbox.  For this night we only flocked up to the edge of the urban portion in preparation for the roads.


Speaking of roads, some 1/8 inch foam tape is used to form the borders for the next step.  I had a layout figured out and measured and marked all of the road edges.


Next it was time to pour the roads.  For this I use water putty since it dries faster and stronger than plaster of Paris. It weighs about the same and is also a little easier to work with in cases where there is sculpting involved.  


I used a tape knife to level and smooth out the putty to fill the designated areas, in this case plaster may have been easier to work with.  This is where we left off for Sunday as the hour was late and we ran out of putty before I was done with the roads.


Thursday began with cleaning out a shop vac and then vacuuming up the excess sand mixture from the previously flocked side of the board.


It took far too long for my liking and was far too loud, but still faster and more effective than sweeping.


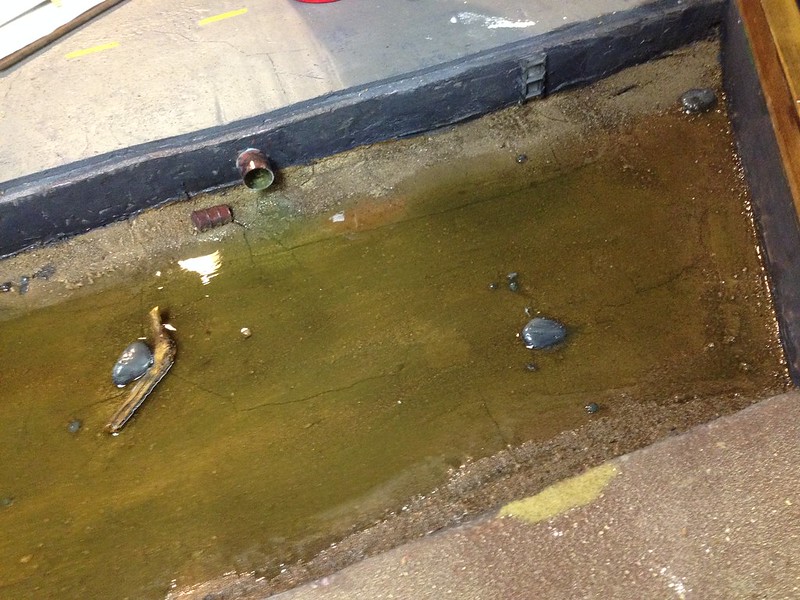
After that I finished pouring the roads and we waited for them to dry up a bit.  Once that was done it was time for some battle damage.  So the Stukas were called in for a bombing run.


This is where the road vanishes and the wastes begin and so the end of the road has got to be a bit rough.  The hammer ended up being a mistake as it caused so much vibration that this section of road lifted from the foam.  Again, lesson learned, again Elmer's fixed it.


The end of the derelict road.


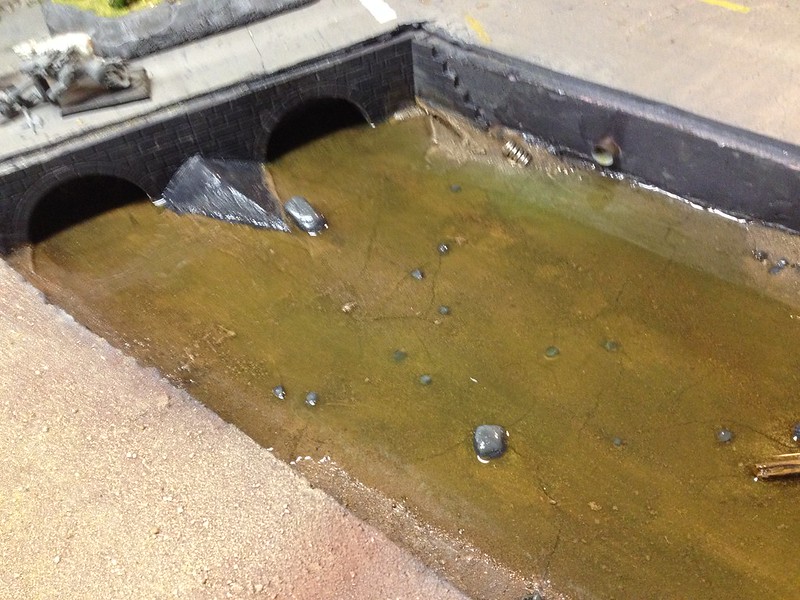
I made an assortment of sizes for the road damages, some autocannon some strafing runs etc.


Then we flocked the rest of it.  I also added some debris around the craters on the roads.


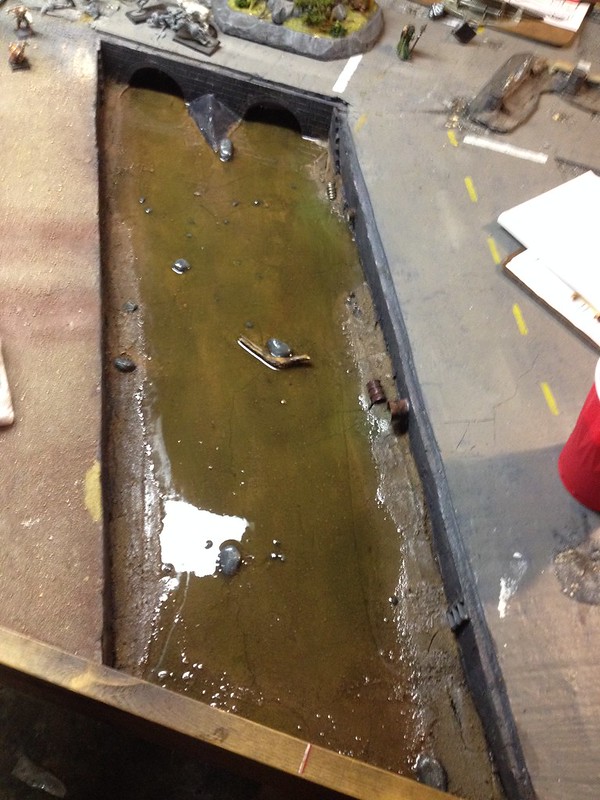
Next, I painted up the far end of the board.  I used spray paint and it went very quickly, I also painted some of the terrain I made awhile back and flocked along with the board.


The urban part of the city got a black base coat and some gray variations.  The road is going to be gray, so that got a pretty solid coat of gray.  This picture makes it look as if there is more urban than dirt, but this is not true, it's pretty close to 50/50.


Next week I will begin dry brushing the flock and cleaning up the edges of the overspray.  I'll also be adding details like road stripes and the like.  Got a lot done but there is still plenty left to do!