It's been awhile, but the blog has finally caught up to me. I don't have a finished model to post this week. That's not to say there is nothing! I have here a long in coming squad of Cadian Rough Riders squad which I have been working on for a rather long time. I started converting the first one in 2012!!! You can see a post about that HERE. I've posted about them here and there since then, but now they are finally getting some much needed paint!
Not being a Fantasy [R.I.P.] player, I've never had to paint any horses before, so that's where I started working here. I finished them in April or so and then having to do base layers on the riders has caused me to stretch out painting them ever since. I loathe doing base colors. Today I finally finished the base colors and even threw a wash on. I hope to keep rolling along and finish them by next week. That way I can start a new project before the next blog post.
I think I have mentioned it before but they are going to be magnetized to allow for some variation, if I ever use them that is. Stay frosty!
Showing posts with label workshop. Show all posts
Wednesday, July 1, 2015
WH40k: WiP Cadian Rough Riders
Wednesday, May 6, 2015
WH40k: Aegis Defense Line
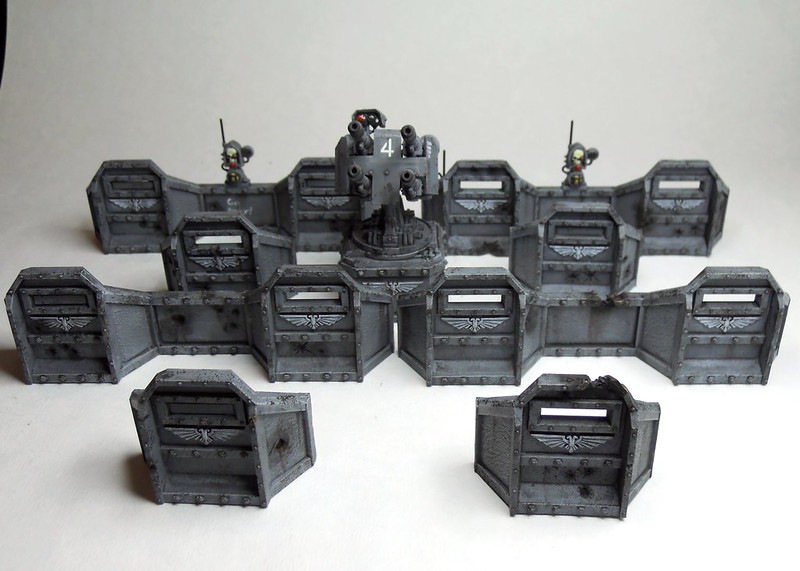
All that infantry needs some protection, so I've painted up my Aegis Defense line to help keep 'em all alive. I have not used this set too often, but I really like the look of it and the quad autocannon. I think I put this together and did all of the modelling work some time in 2013. I went and did a lot of battle scarring and added a bit of details to the set to make it seem more unique. Most notable on the walls I've used plasticard to show some of the shutters as being closed.
I spent a lot more time painting this than I had planned. For terrain I usually just try and keep it simple. I ended up doing all sorts of washing, grime, and pigments. I think it was worth it.
More pictures after the break.
I spent a lot more time painting this than I had planned. For terrain I usually just try and keep it simple. I ended up doing all sorts of washing, grime, and pigments. I think it was worth it.
More pictures after the break.
Wednesday, February 4, 2015
BFG: Imperial Navy Reinforcements
So, the first post of the new year. Happy 2015, even if I am a bit late on that. As usual it's been far too long since my last post. Though, I assure you, I have been busy on the hobby front. I've been painting models from the whole spectrum of my collections. I spent a good few hours taking photographs and editing them this week to try and pick up the blog slack. I've got photos for about 11 posts all up and edited on flickr. So I will probably write a few posts and then set them to auto publish some time in the future. This will grant the illusion that I am actively updating this blog.
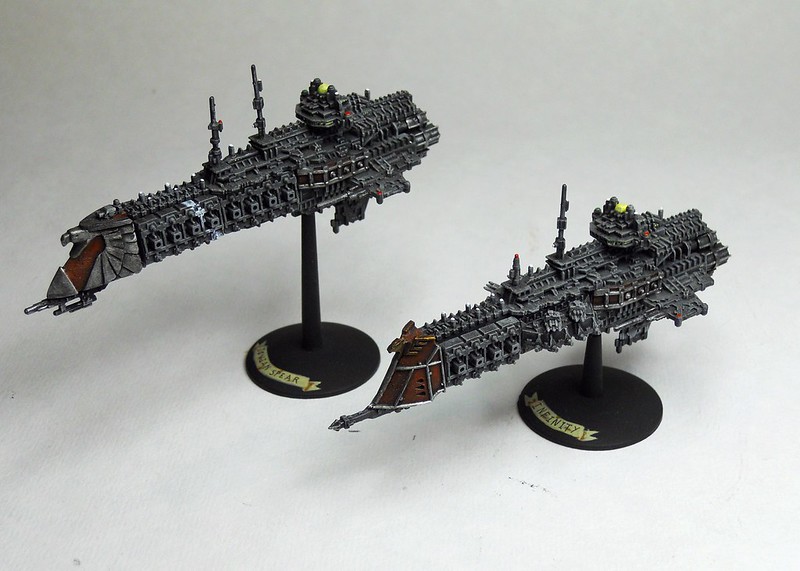
Now the reason anyone is here, for pictures. Well one picture. These are a pair of Imperial Cruisers I painted up several months ago now. They are both magnetized to be any of the cruiser variants. For these two ships I tried a new technique in painting these ships. Instead of picking out different details with different shades I decided to go with a drybrush and wash method. I am pretty happy with how this worked. It seems to look better than how I used to paint them. Some other changes made are the addition of some markings, namely the stripe on the lower fin of one and on the weapons batteries of the other. I've named these two cruisers Jovian Spear (left) and Infinity (right).
Hope you enjoy the new look of the ships, just trying to keep this game alive for as long as possible. I still have plenty of these ships to build and paint since I stocked up right at the end, so don't worry about not having any more BFG to see from me.
Saturday, September 20, 2014
APOCALYPSE!
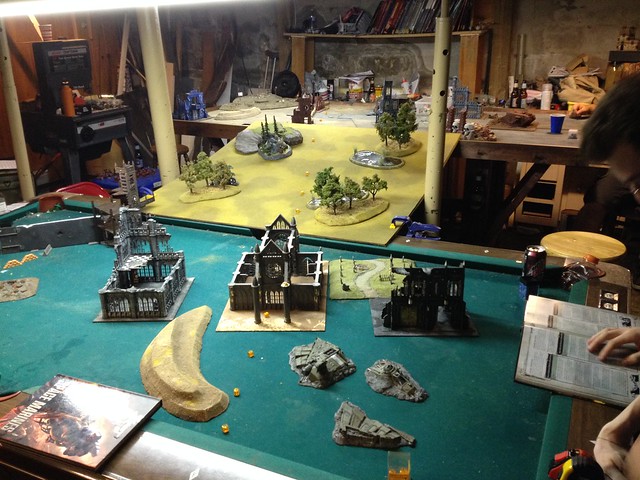
So last month our group had an apocalypse game, 6 players, 5000 points each. It was Imperial Guard, Blood Angels and Space marines on my team and Chaos, Orks, and traitor Guard on the other side. By the end the Imperial Side was really decimated, and so we called it after the second session. Defilers and their daemon saves be damned.
Week 1 was our set up and deployment Week 2 saw the forces of evil winning 4 objectives to 2 and a slight advantage in kills as well. Week 3 saw evil with 9 objective points to 3 and the Imperial forces with enough casualties to render them ineffective against a much larger force. It was a huge clusterfuck but it was still fun.
Here are a few pictures. With the whole album available here.
Week 1 was our set up and deployment Week 2 saw the forces of evil winning 4 objectives to 2 and a slight advantage in kills as well. Week 3 saw evil with 9 objective points to 3 and the Imperial forces with enough casualties to render them ineffective against a much larger force. It was a huge clusterfuck but it was still fun.
Here are a few pictures. With the whole album available here.
Sunday, August 10, 2014
July-August Update
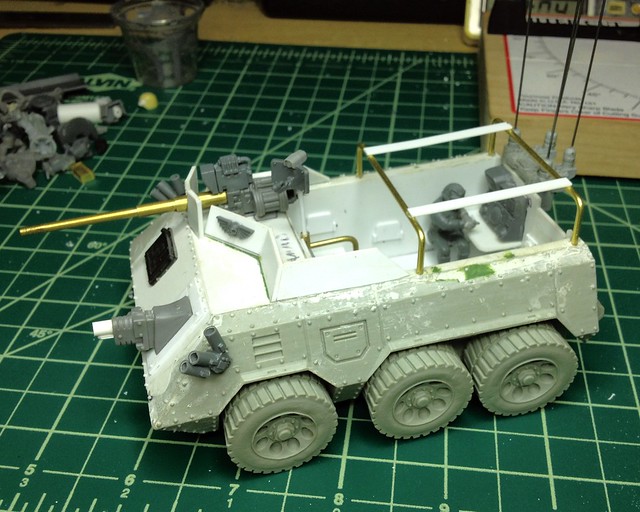
Been slipping on updating again, but not on working! Since the last update I have been pretty darn busy! I painted a bunch of BFG cruisers after I finished the Knights. Then I built my Hydra kit, with a few added details and modifications. After that I finished up my rough riders after I found some legs to use from Curious Constructs. After that I finished up my Salamander Scout Car. More recently I have been working on something special for BFG. A dreadnought class vessel which will be called Triton, I'll hold off on pictures on this for now, but once I finish roughing out the main components you can expect a post. Lastly I finally got some of the new Rebel fighters for X-Wing today and decided to try a new theme, sorta German Luftwaffe inspired color scheme. You can see the test model on the Headhunter below, after the break.
Wednesday, June 25, 2014
The Knights of the Order of Thanatos
Yet again I have to introduce a post after such a long hiatus from the blog. It's been quite a while since I have updated this blog with the idea of re-shooting my model collection. That has not happened, but I have not been idle. As I mentioned back then I did repaint my Baneblade, Zeal, though I failed to take any pictures until today. In the meantime the release of the Imperial Knight kit by Games Workshop really got me fired up and into painting mode. My friend Kevin and I immediately decided to order some of them and I would paint them to match. We've always wanted to start a Titan Legion, but have never spent the cash, so this was a pretty awesome second chance. We each ordered a Knight and I also ordered a Dreamforge Leviathan, not knowing it would be far too large to join our Knightly Order and will instead he the founding member of a Titan Legion. In exchange for painting his Knight, Kevin paid for some of my order and also got the expanded decal set. Three months later and I have finally kept up my end of the bargain and finished the Knights. Not for lack of effort though as April was the only month I really did not work on them. But we are going to have an Apocalypse game soon and I really wanted to have them done for that, even if they will be on opposite sides of the conflict.
Without anymore senseless blather, here they are, face to face, ready to fight.
More after the break.
Without anymore senseless blather, here they are, face to face, ready to fight.
![]() |
| The Imperial Knight is a really fantastic kit and a dream to build and paint. The only thing I would ask for is a bit more freedom in the legs. |
More after the break.
Saturday, April 27, 2013
Litany of Hate
My latest project is complete. My brother bought this Modified Ryza Patter Vanquisher turret from FW last year and I bought the hull from a friend who was selling off his guard army. As with most of my vehicles throughout the years I added another step or process in painting this one. On the one side, it means this tank looks better than those which came before, on the other side, it means most of my tanks look slightly different. The turret is where my new techniques which were mentioned last post can really be seen, as the hull's lines were muddled my old paint which I could not get to come off.
Now, with what I learned on this tank I can make my next one look better, hopefully. All of the filters and washes and such dulled out the modulation a bit more than I expected them to, so next time I will probably make the bright tone a little lighter.
Here it is, the Leman Russ Vanquisher Litany of Hate:
Now, with what I learned on this tank I can make my next one look better, hopefully. All of the filters and washes and such dulled out the modulation a bit more than I expected them to, so next time I will probably make the bright tone a little lighter.
Here it is, the Leman Russ Vanquisher Litany of Hate:
| They see me rollin, they dying. |
Friday, February 22, 2013
Destroyer Tank Hunter
So, I finally got around to painting up my converted tank destoyer. I settled upon the name Armordillo. This tank will be the lead vehicle for my 3rd Armor Squadron. The other 2 tanks are FW turreted Vanquishers. I used a couple new products on this tank. They are AK productions panzer grey grime and concrete dust effect. I used these to do some streaking which you can see in some of the side on shots. Without further ado, here's the pics.
You can see the art I made on the barrel of an armadillo with a cannon in its back.
Saturday, January 19, 2013
MURDER: INITIATE!
I don't really care for Ogyrns, I mean sure they endearingly stupid and naive but they're abhumans. So, here's my solution so that I can use Ogyrns in my army; Mechanicus constructed Murder Servitors. They're big, they're mean, they have guns for hands. I built these guys a while back (over a year ago I think) and I finally got around to painting them thanks to an ongoing challenge. My friend Kevin and I have agreed to paint 1 unit a week for the foreseeable future, barring and sickness or vacations. If one of us fails to complete something in a given week, then we owe the other $20. The first week I painted my Recon Grenadiers and he finished his Cygnar Stormwall. Last week he painted his Mordhiem Warband and I started these guys. I did not get too much done and wound up owing him 20 bucks. This week I spent 4 nights working on these guys and finished them!
Here they are ready to murder your troops!
All that skin and muscle detail is the reason they took so long, I will say that I would never want to paint an Ogre army...
That's it for now, next week I am going to try and paint my rebuilt Mordhiem warband. Last time I used Empre State Troops. I wanted a grittier look so I have remade them using Empire Militia and Empire Greatswords. I am very pleased with how they turned out.
Stay tuned!
Labels:
40000,
40k,
conversion,
elites,
games,
games-workshop,
gaming,
guard,
imperial,
murder,
ogyrns,
painted,
servitor,
table,
tabletop,
top,
war,
wargaming,
warhammer,
workshop
Friday, September 7, 2012
New table, new terrain! [Part 9]
Just a small update today. I have not been doing much of anything on the hobby front for the last 2 weeks. Tomorrow there is a tournament in Rochester though, so I am excited about that. It should get me rolling again.
Here's the building I painted at our last game night. It's a small mechanicus building. It was built from spare parts by Kevin and has been known as the "Minifactorum" for years now. Glad to finally see it painted!
Here's a shot of the inside.
Gonna take my camera to the tournament and take lots of pictures (if I remember to) so expect some battle reports over the next week or so. Probably going to pick up some more models for Dust: Warfare so I should have an update for that game coming too. I have actually painted quite a few units, but I have not come up with a basing scheme yet, so I have not photographed them.
Here's the building I painted at our last game night. It's a small mechanicus building. It was built from spare parts by Kevin and has been known as the "Minifactorum" for years now. Glad to finally see it painted!
Here's a shot of the inside.
Gonna take my camera to the tournament and take lots of pictures (if I remember to) so expect some battle reports over the next week or so. Probably going to pick up some more models for Dust: Warfare so I should have an update for that game coming too. I have actually painted quite a few units, but I have not come up with a basing scheme yet, so I have not photographed them.
Labels:
28mm,
cities,
death,
game,
games,
manufactory,
of,
table,
tabletop,
terrain,
top,
war,
wargaming,
workshop
Saturday, August 18, 2012
Rough Rider
Here's a little post of a bit of converting I have been up to. This is my first Rough Rider of what will be a squad of 10. Last month I bought a 10 man Cadian squad and 2 sets of Medieval horses from GW. I started out by picking the set of legs that was closest to working, then I had to do a lot of cutting and shaving to get them to fit.
Here you can really see all of the material I had to remove.
Then, I had to fill a lot back in with green stuff. While that was still pliable I started on the torso because I also had to sculpt the hand holding the lance. I filled in around the neck and all seams on the horse as well.
For the lance tips my brother gave me a bunch of skeleton spears and I took the plainer looking type to use. Much more imposing with a spear tip on there.
Behind the point I added a small box with a light and a wire leading to the point.
That's all on these for now since I do not want to repose and sculpt all of the legs I will be casting copies of this sculpt to use for all of them. Just ordered some silicon and resin to do so, should have it soon. I will also make a mold of some of the BFG stuff I have scratched.
Here you can really see all of the material I had to remove.
Then, I had to fill a lot back in with green stuff. While that was still pliable I started on the torso because I also had to sculpt the hand holding the lance. I filled in around the neck and all seams on the horse as well.
For the lance tips my brother gave me a bunch of skeleton spears and I took the plainer looking type to use. Much more imposing with a spear tip on there.
Behind the point I added a small box with a light and a wire leading to the point.
That's all on these for now since I do not want to repose and sculpt all of the legs I will be casting copies of this sculpt to use for all of them. Just ordered some silicon and resin to do so, should have it soon. I will also make a mold of some of the BFG stuff I have scratched.
Tuesday, July 3, 2012
Damaged Goods.
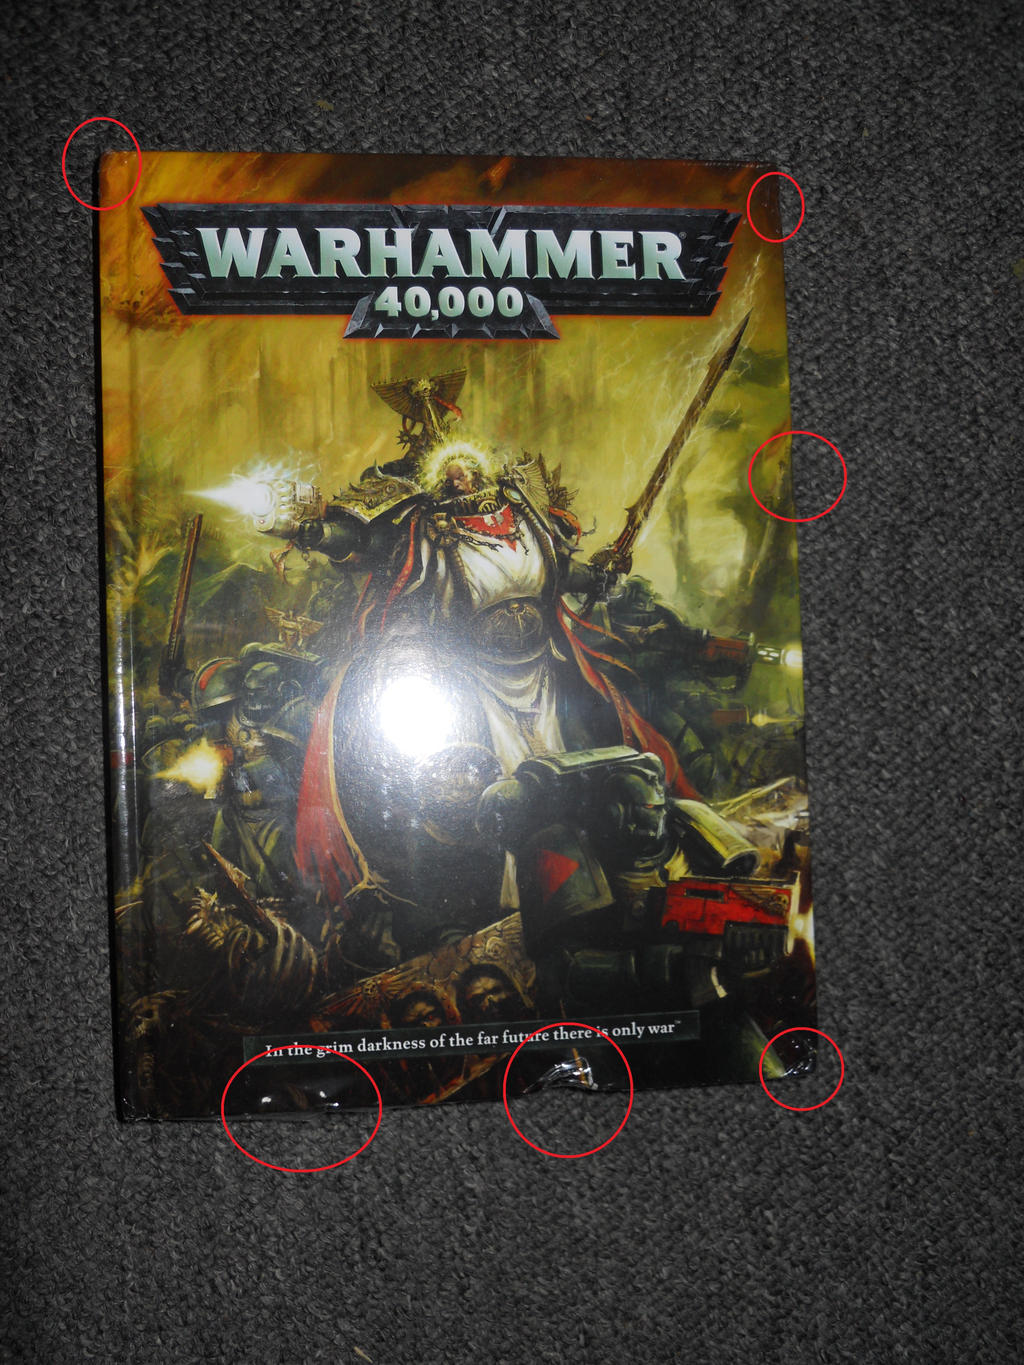
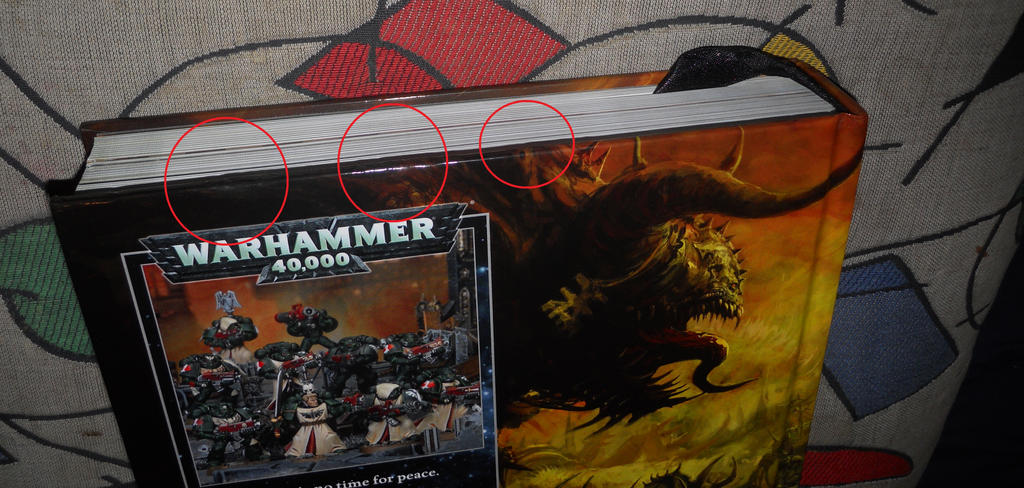
So, I finally received my rulebook today. Still have not gotten a reply as to why it was late, but that's beside everything. I was really glad when I heard that it arrived, we were late getting home from out of town and only had time to grab our stuff before disc golf but I grabbed it for the ride over. When I picked it up I noticed a glaring dent on the lowest edge, so I took a picture before I even opened the wrapper. There are lots of dents around the edges, and the box was undamaged. I don't know if they were playing catch with it or what...
There were some on the back too...
If it was not for the folded corner and that big dent I probably would not be complaining. So not only did I get it late, but it's damaged too. We'll see what GW has to say when I get a reply.
So far the book is great though, they do a good job of explaining everything, much better than in the past, and everything seems very clearly worded. The full color pages are nice and the new art was great to see. Cannot wait to play a few games!
Labels:
000,
2012,
40,
40000,
40k,
6th,
book,
damaged,
edition,
games,
games-workshop,
late,
rule,
rulebook,
warhammer,
workshop
Subscribe to:
Posts (Atom)